Southport Dress/ Panama Tee Dress MASH-UP!

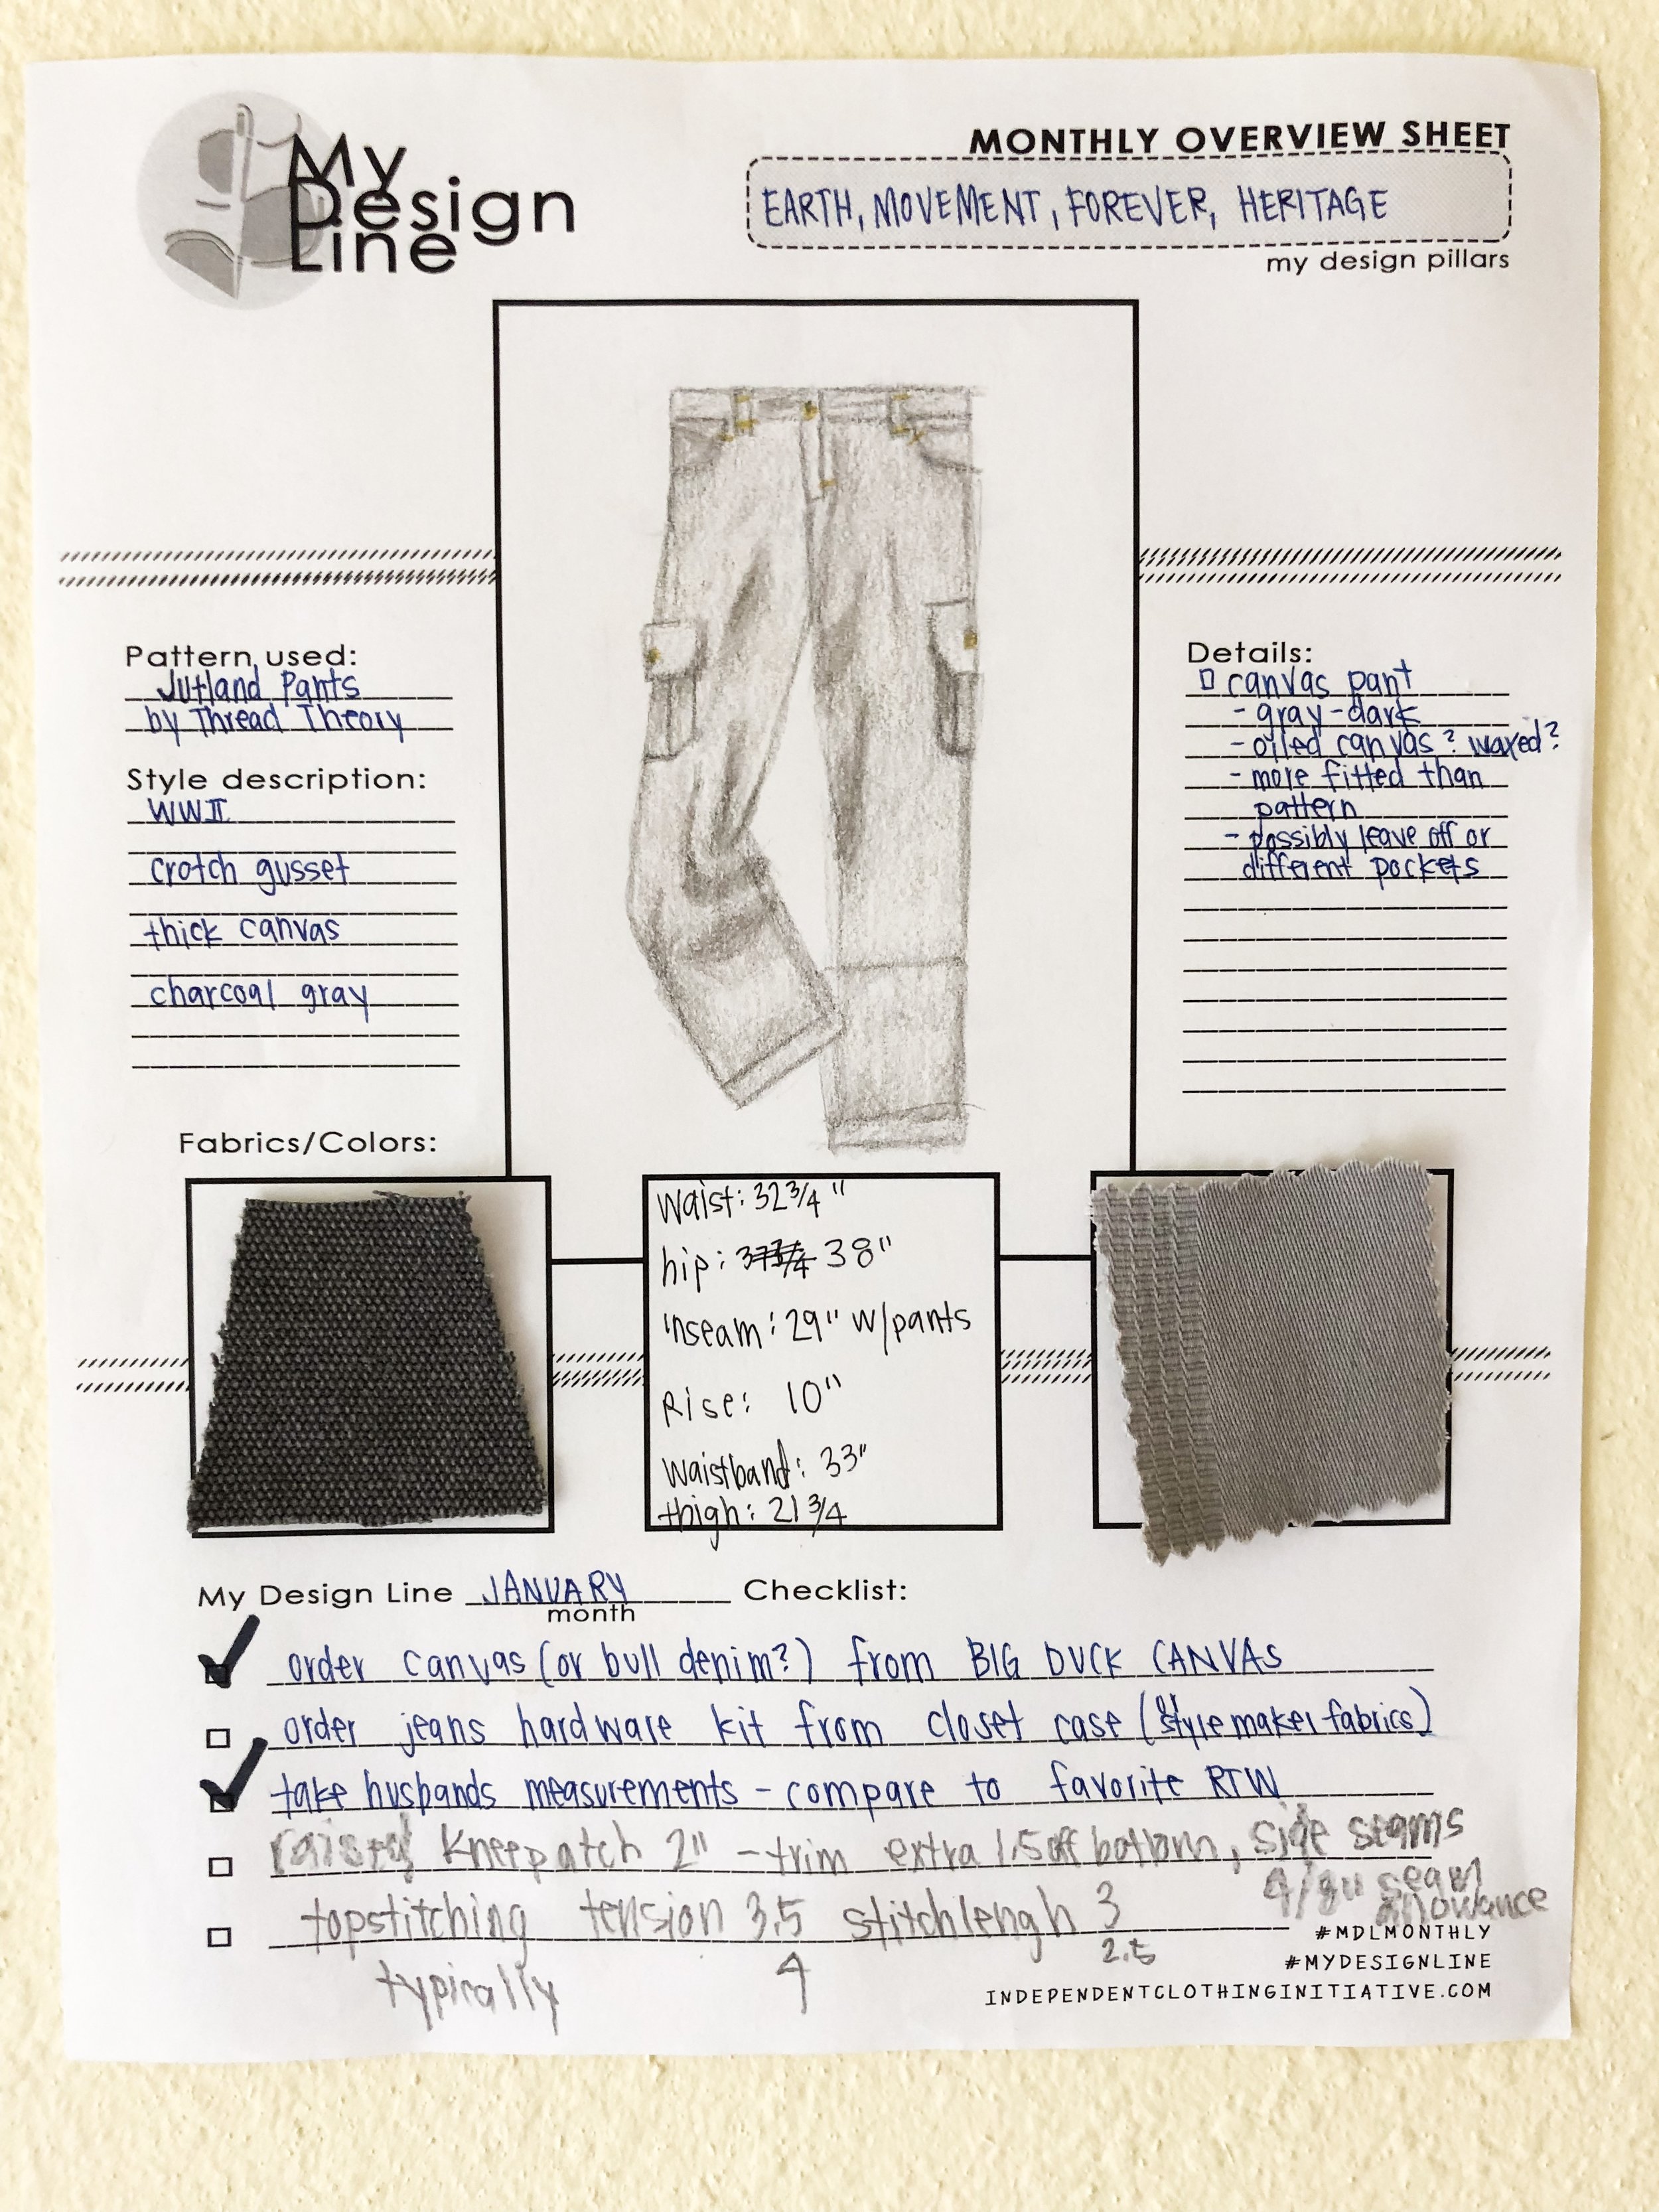
I am always cold. My husband recently came back from a work trip and brought me a Vermont Flannel Company blanket. He told me, because he loves me, he resisted the urge to buy the classic red and black checkered one (don’t worry though, he recently bought me such a wool blanket for a separate holiday… ha!). Instead he purchased a multi colored, bright and cheery version because he said he knew I would like it (cue feeling all the feels!).

I think he loves me!

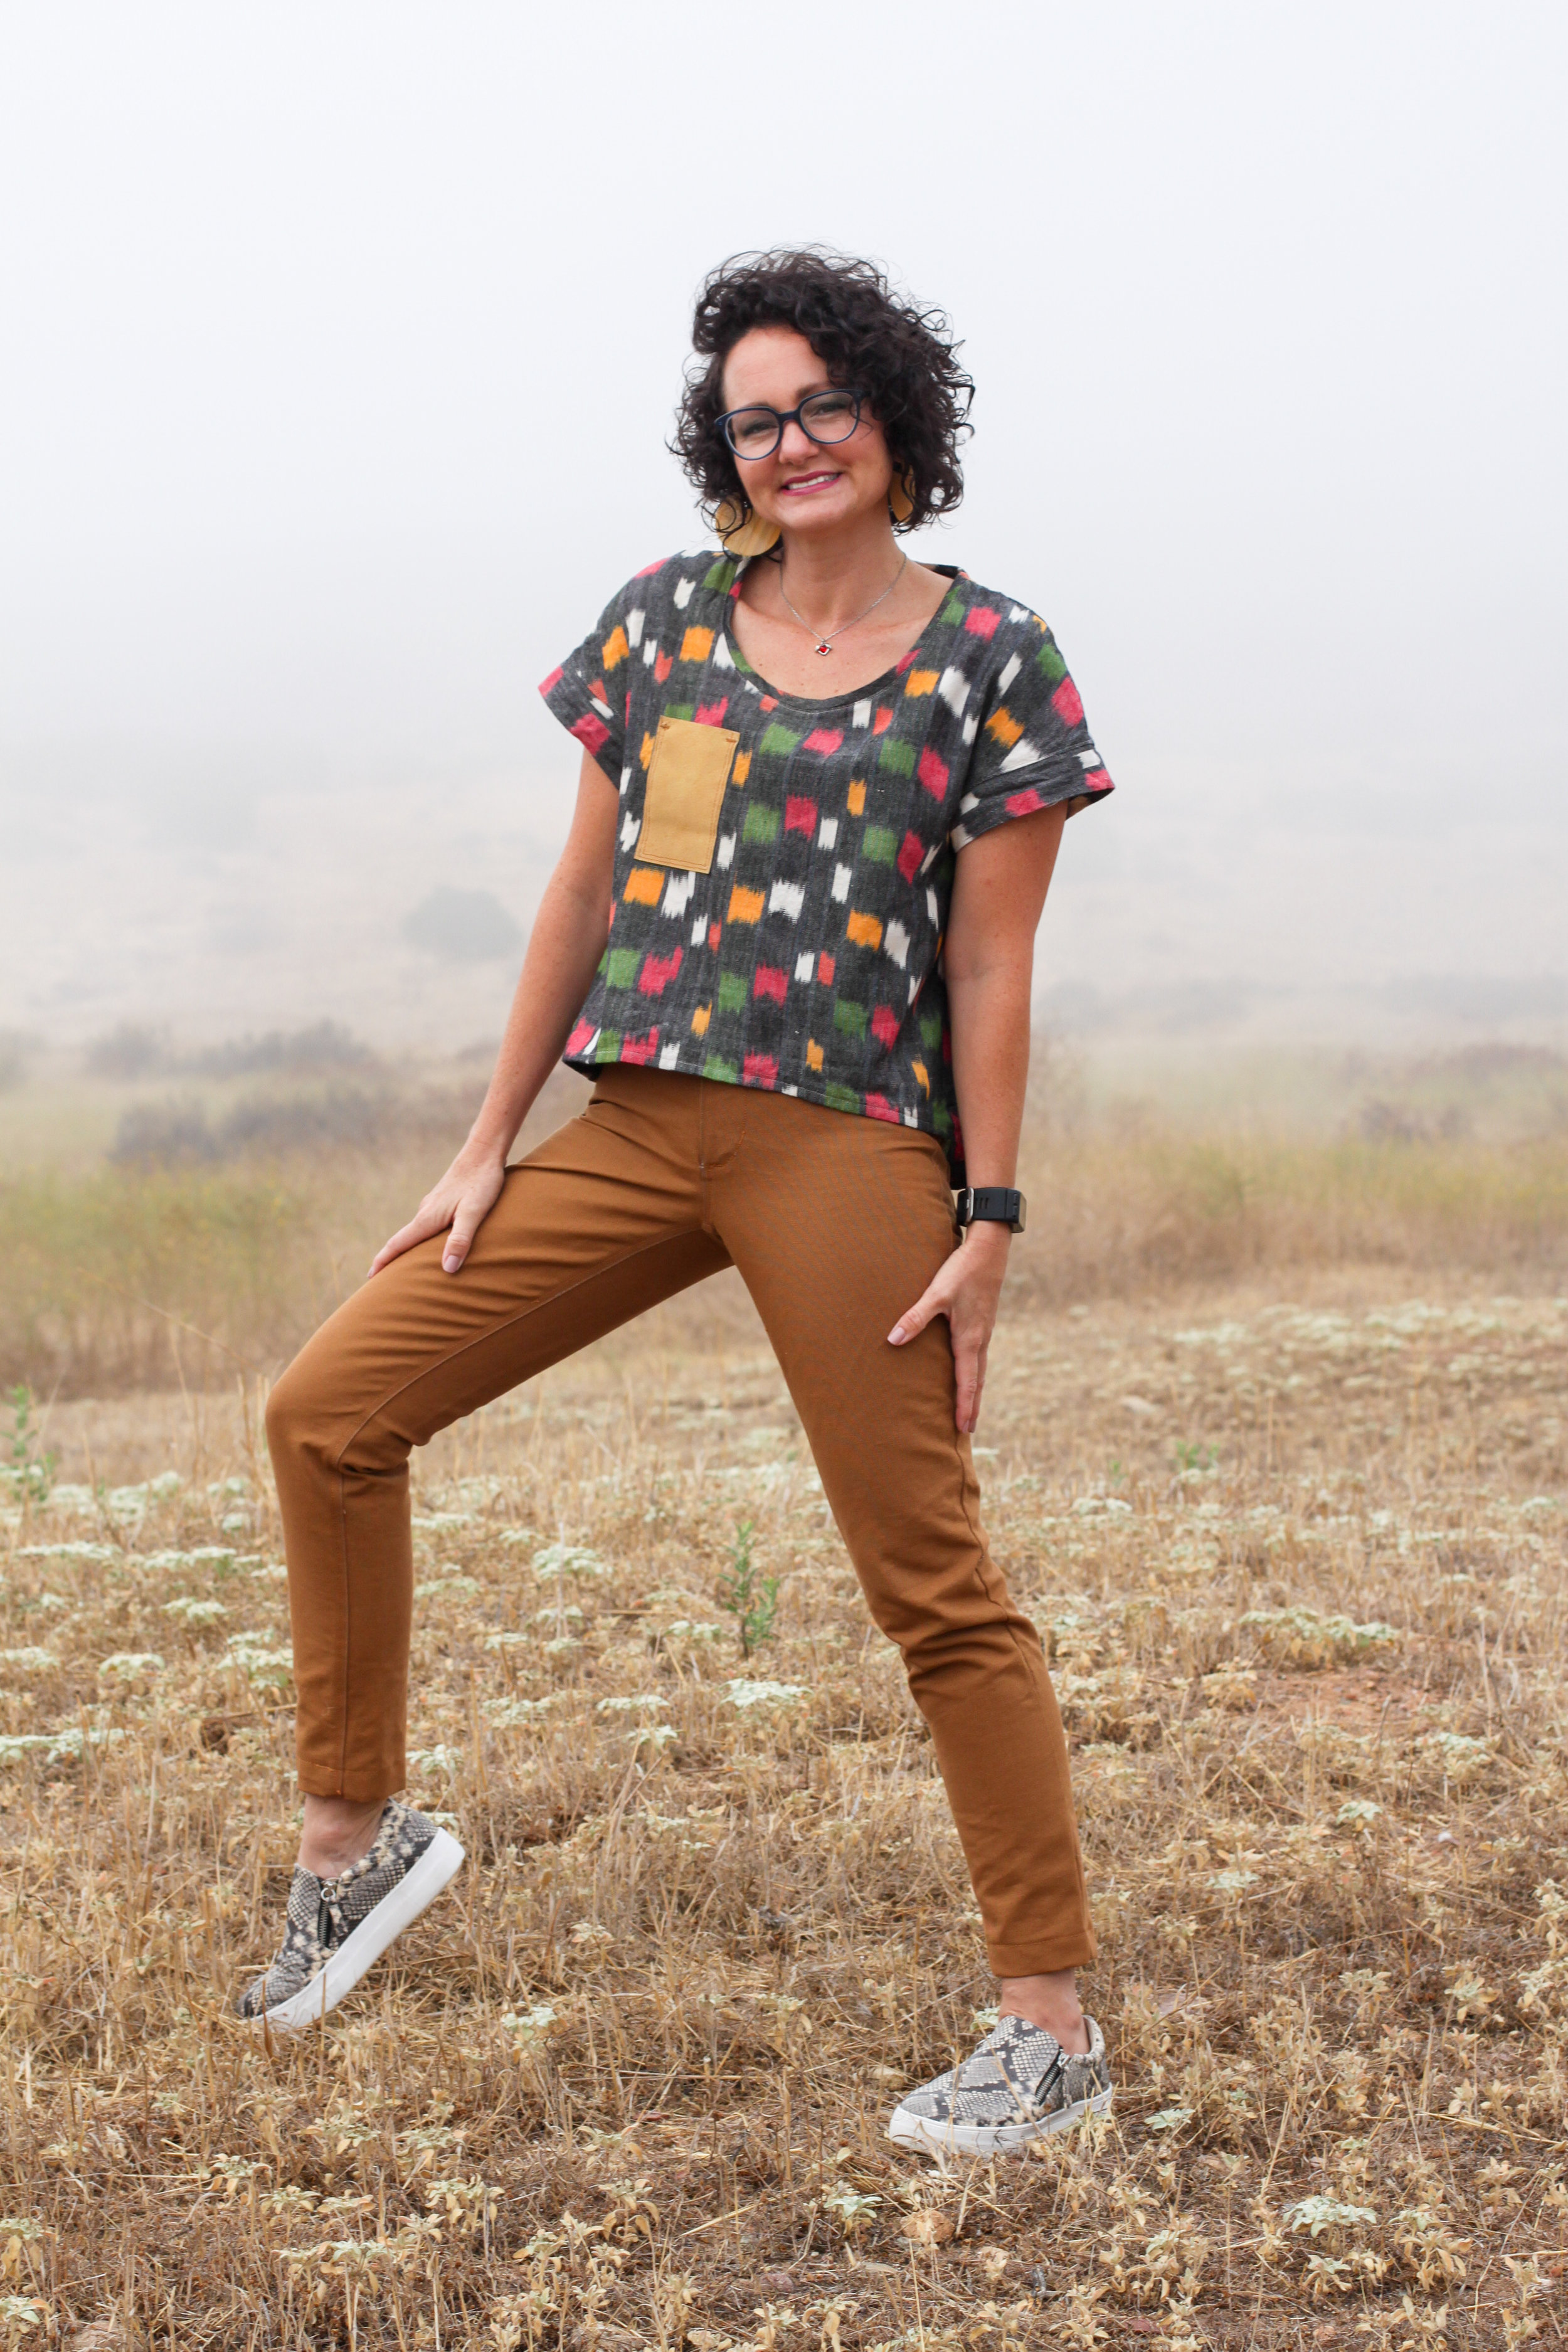
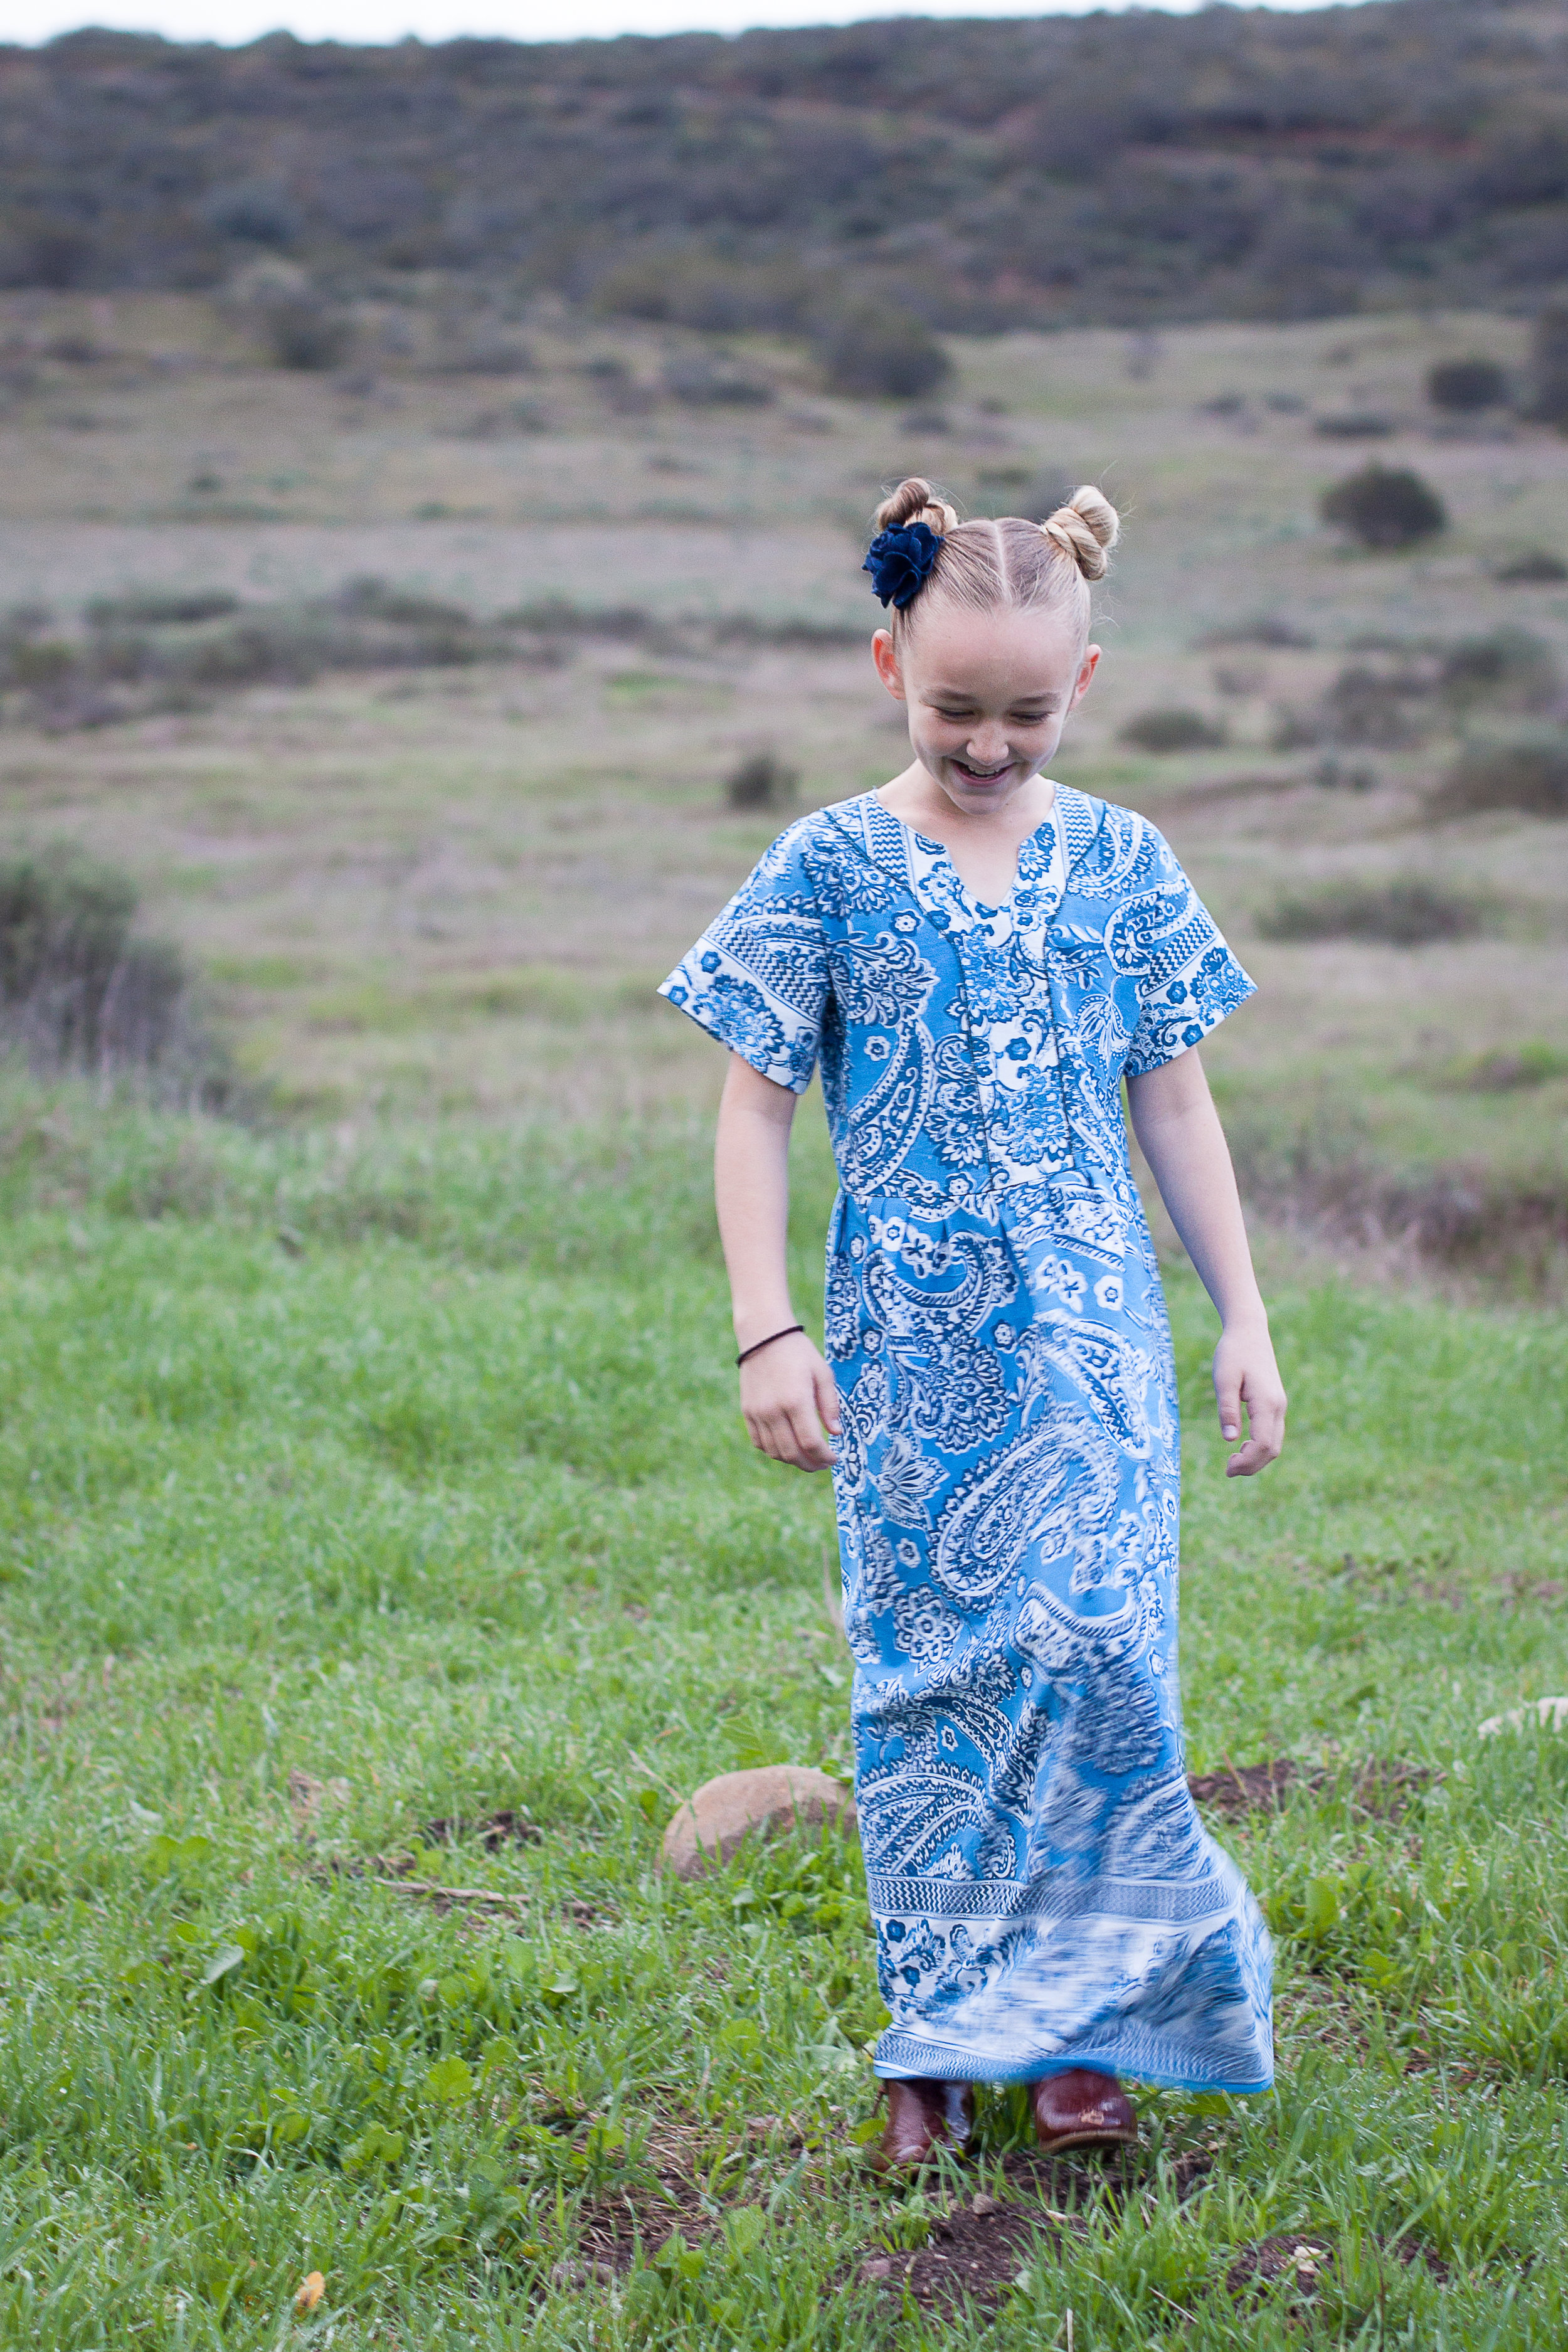
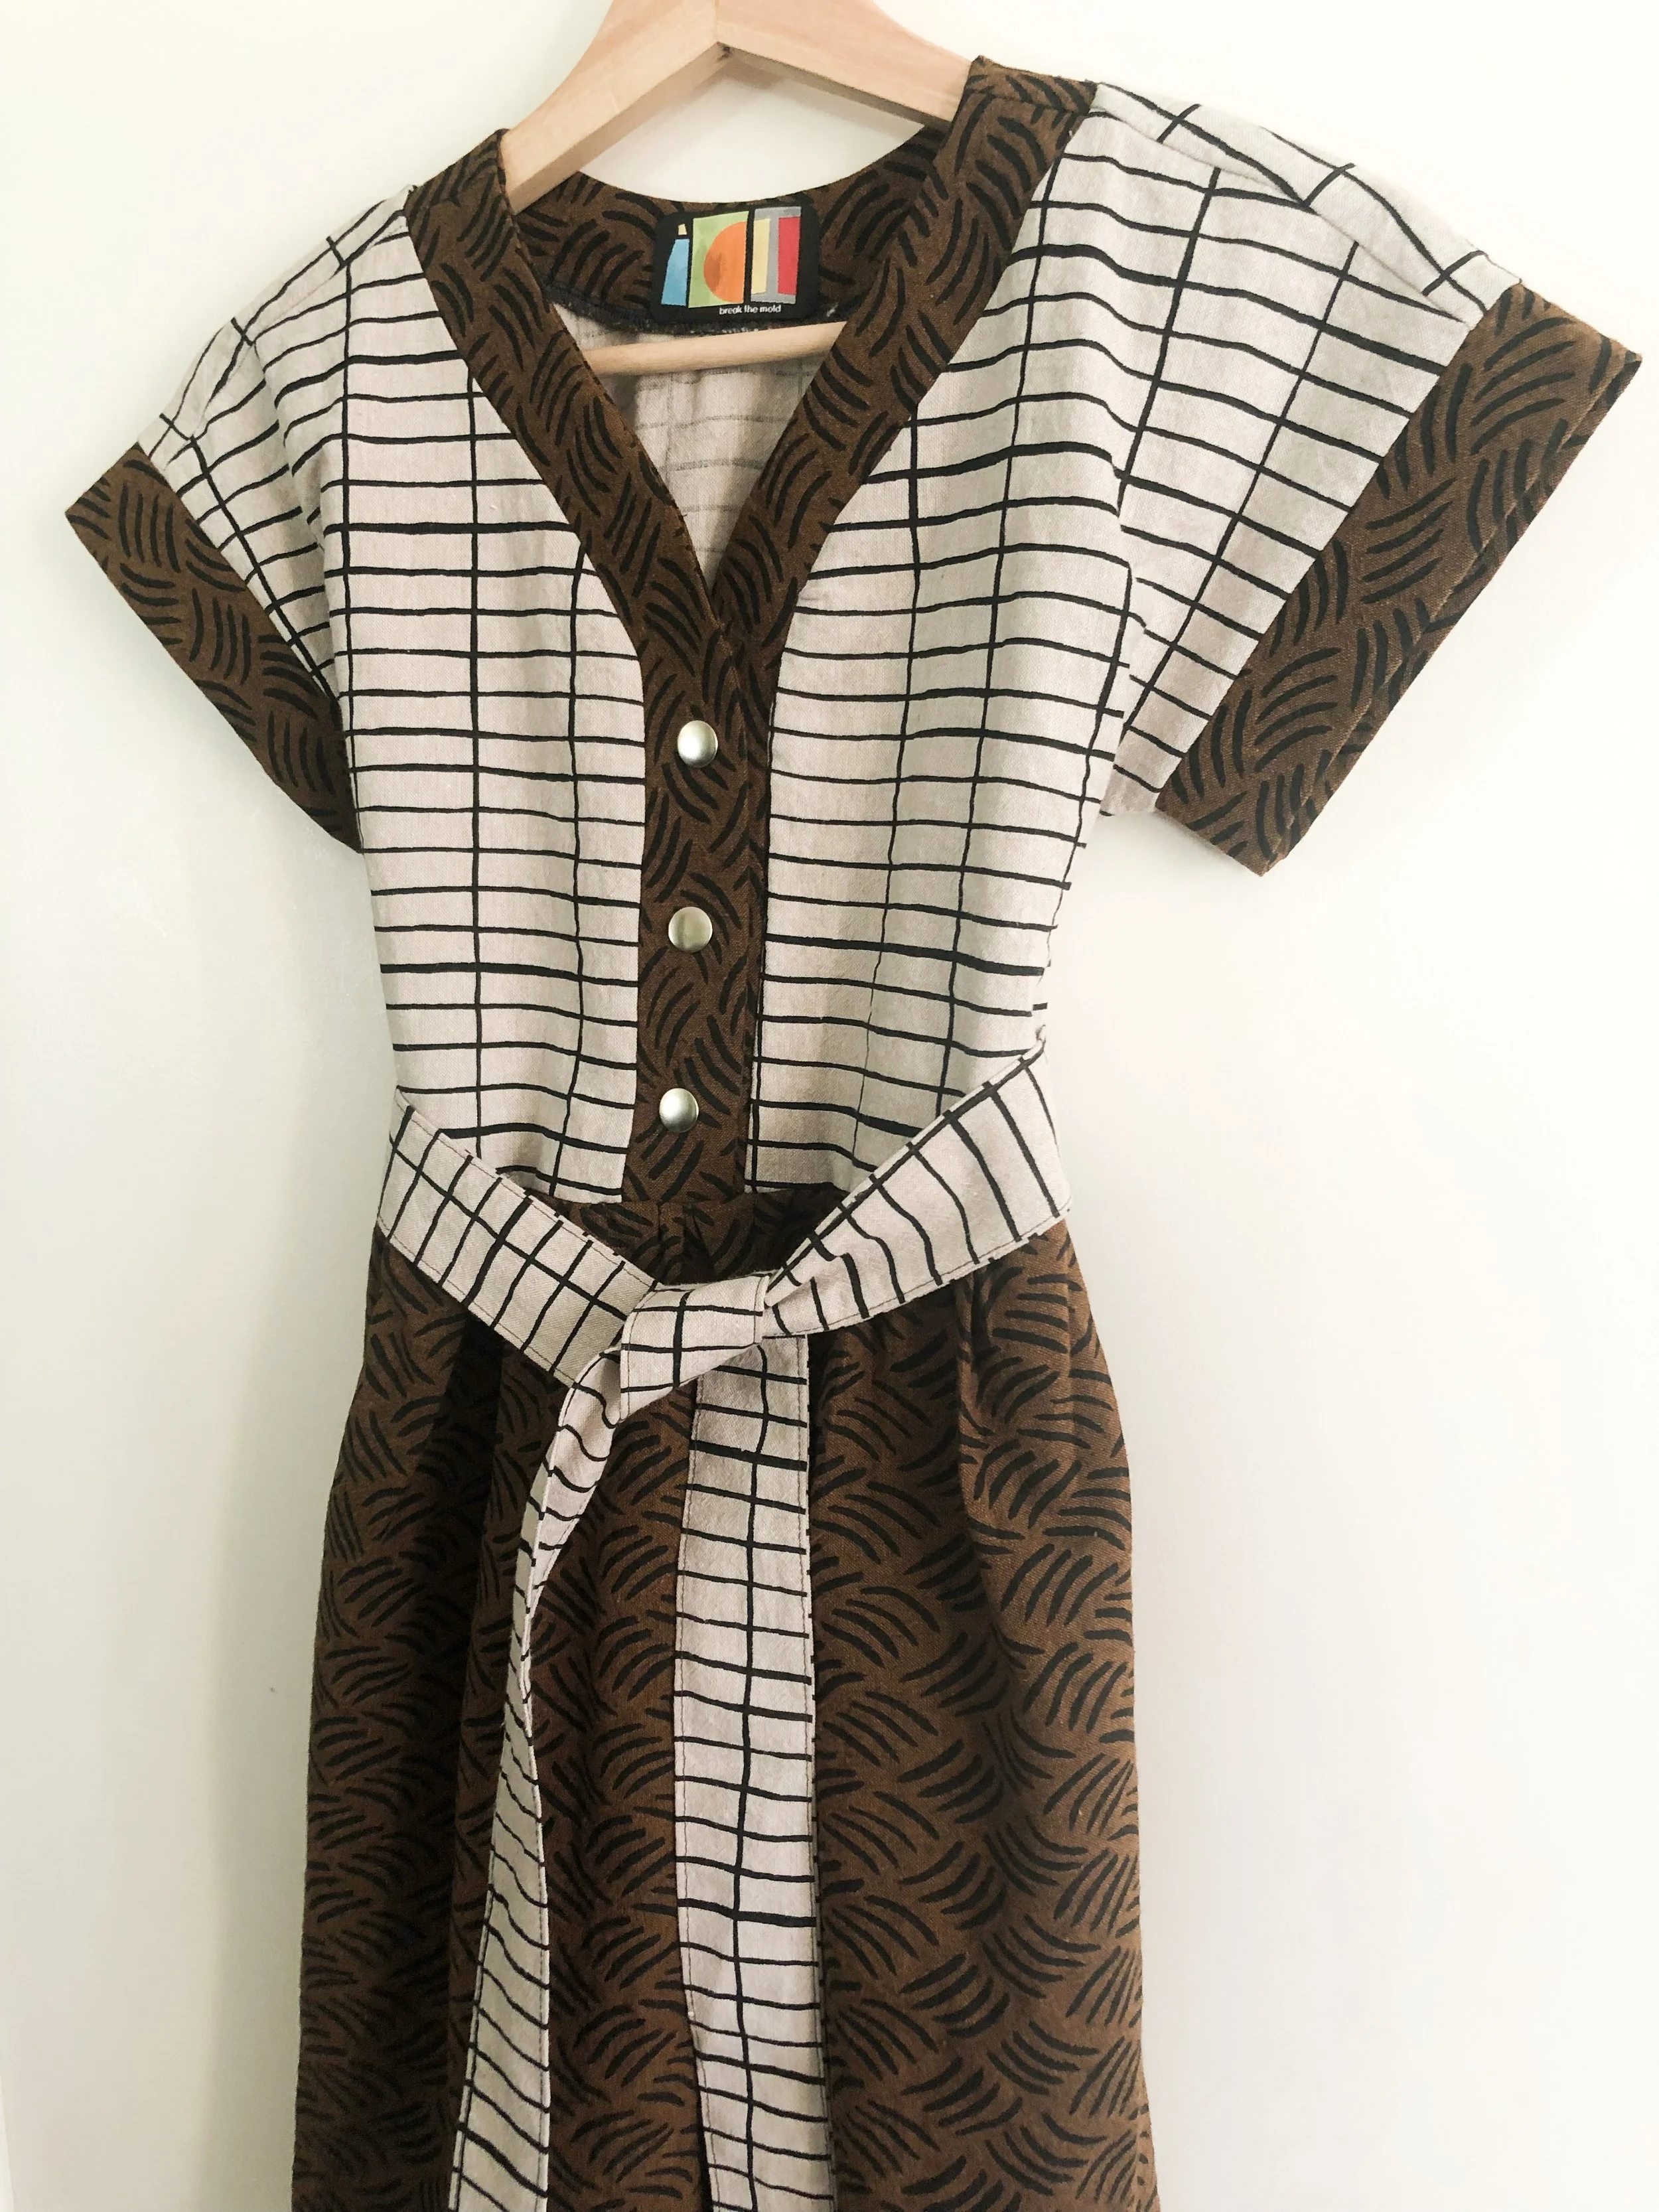
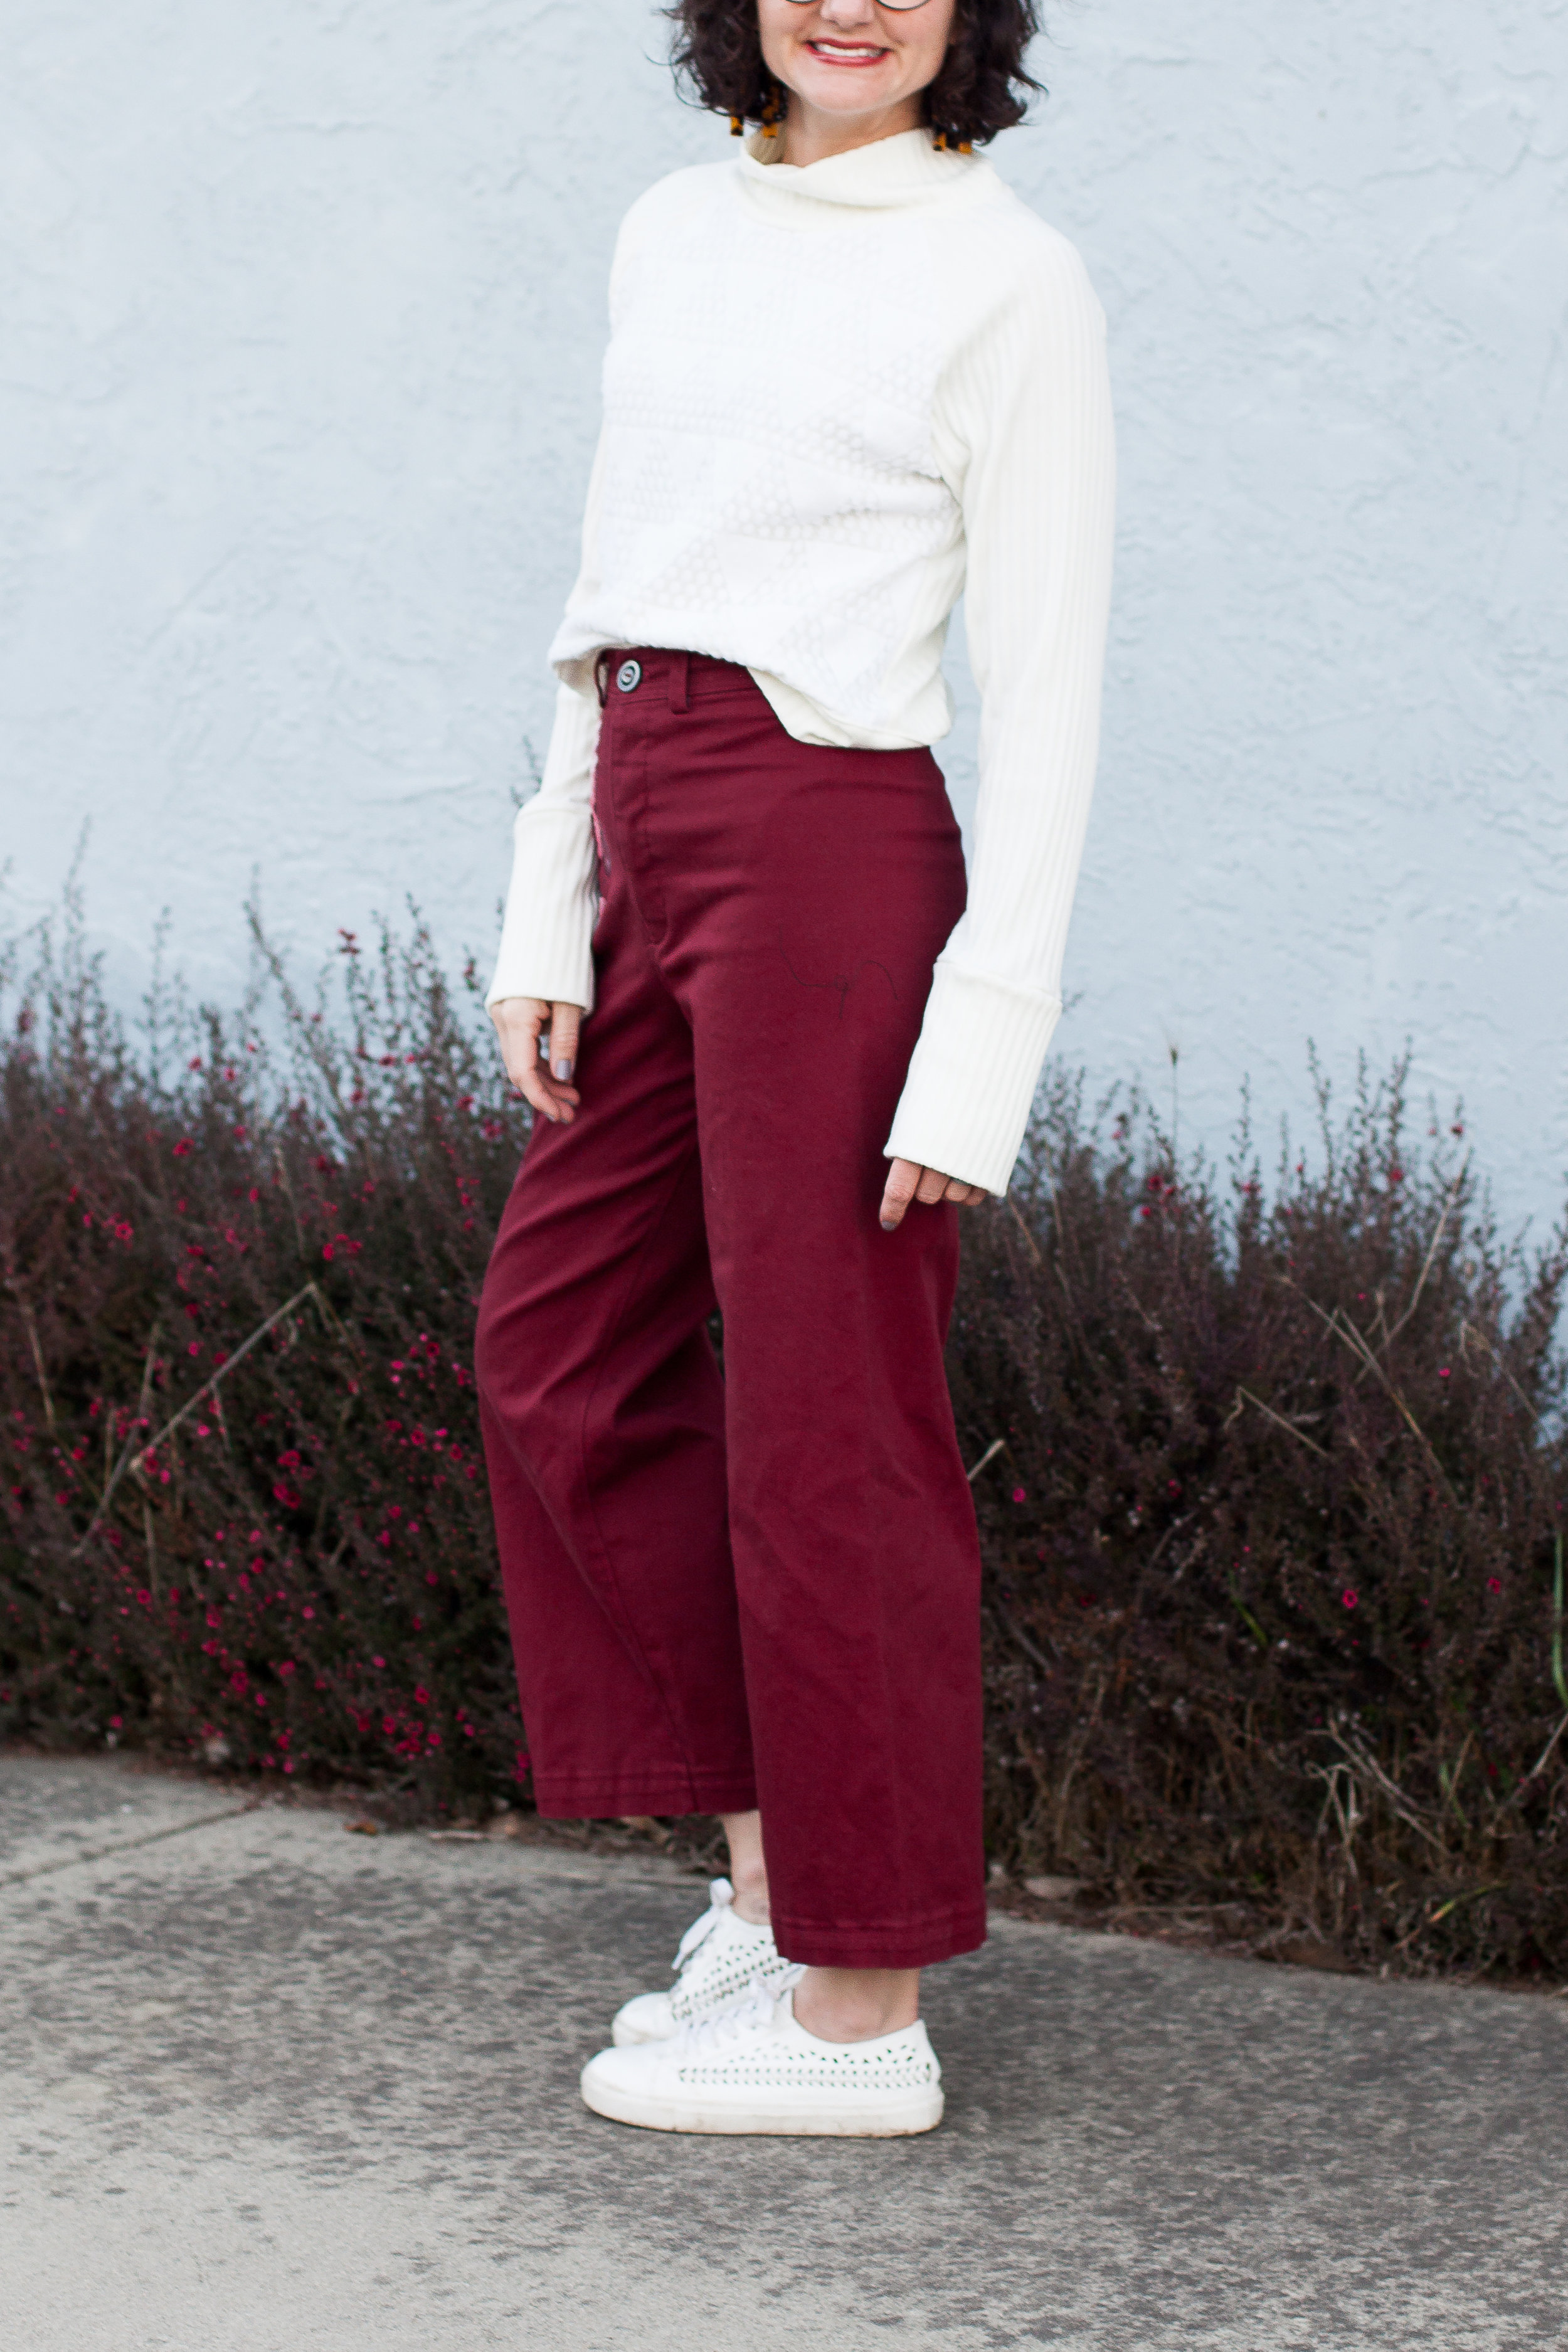
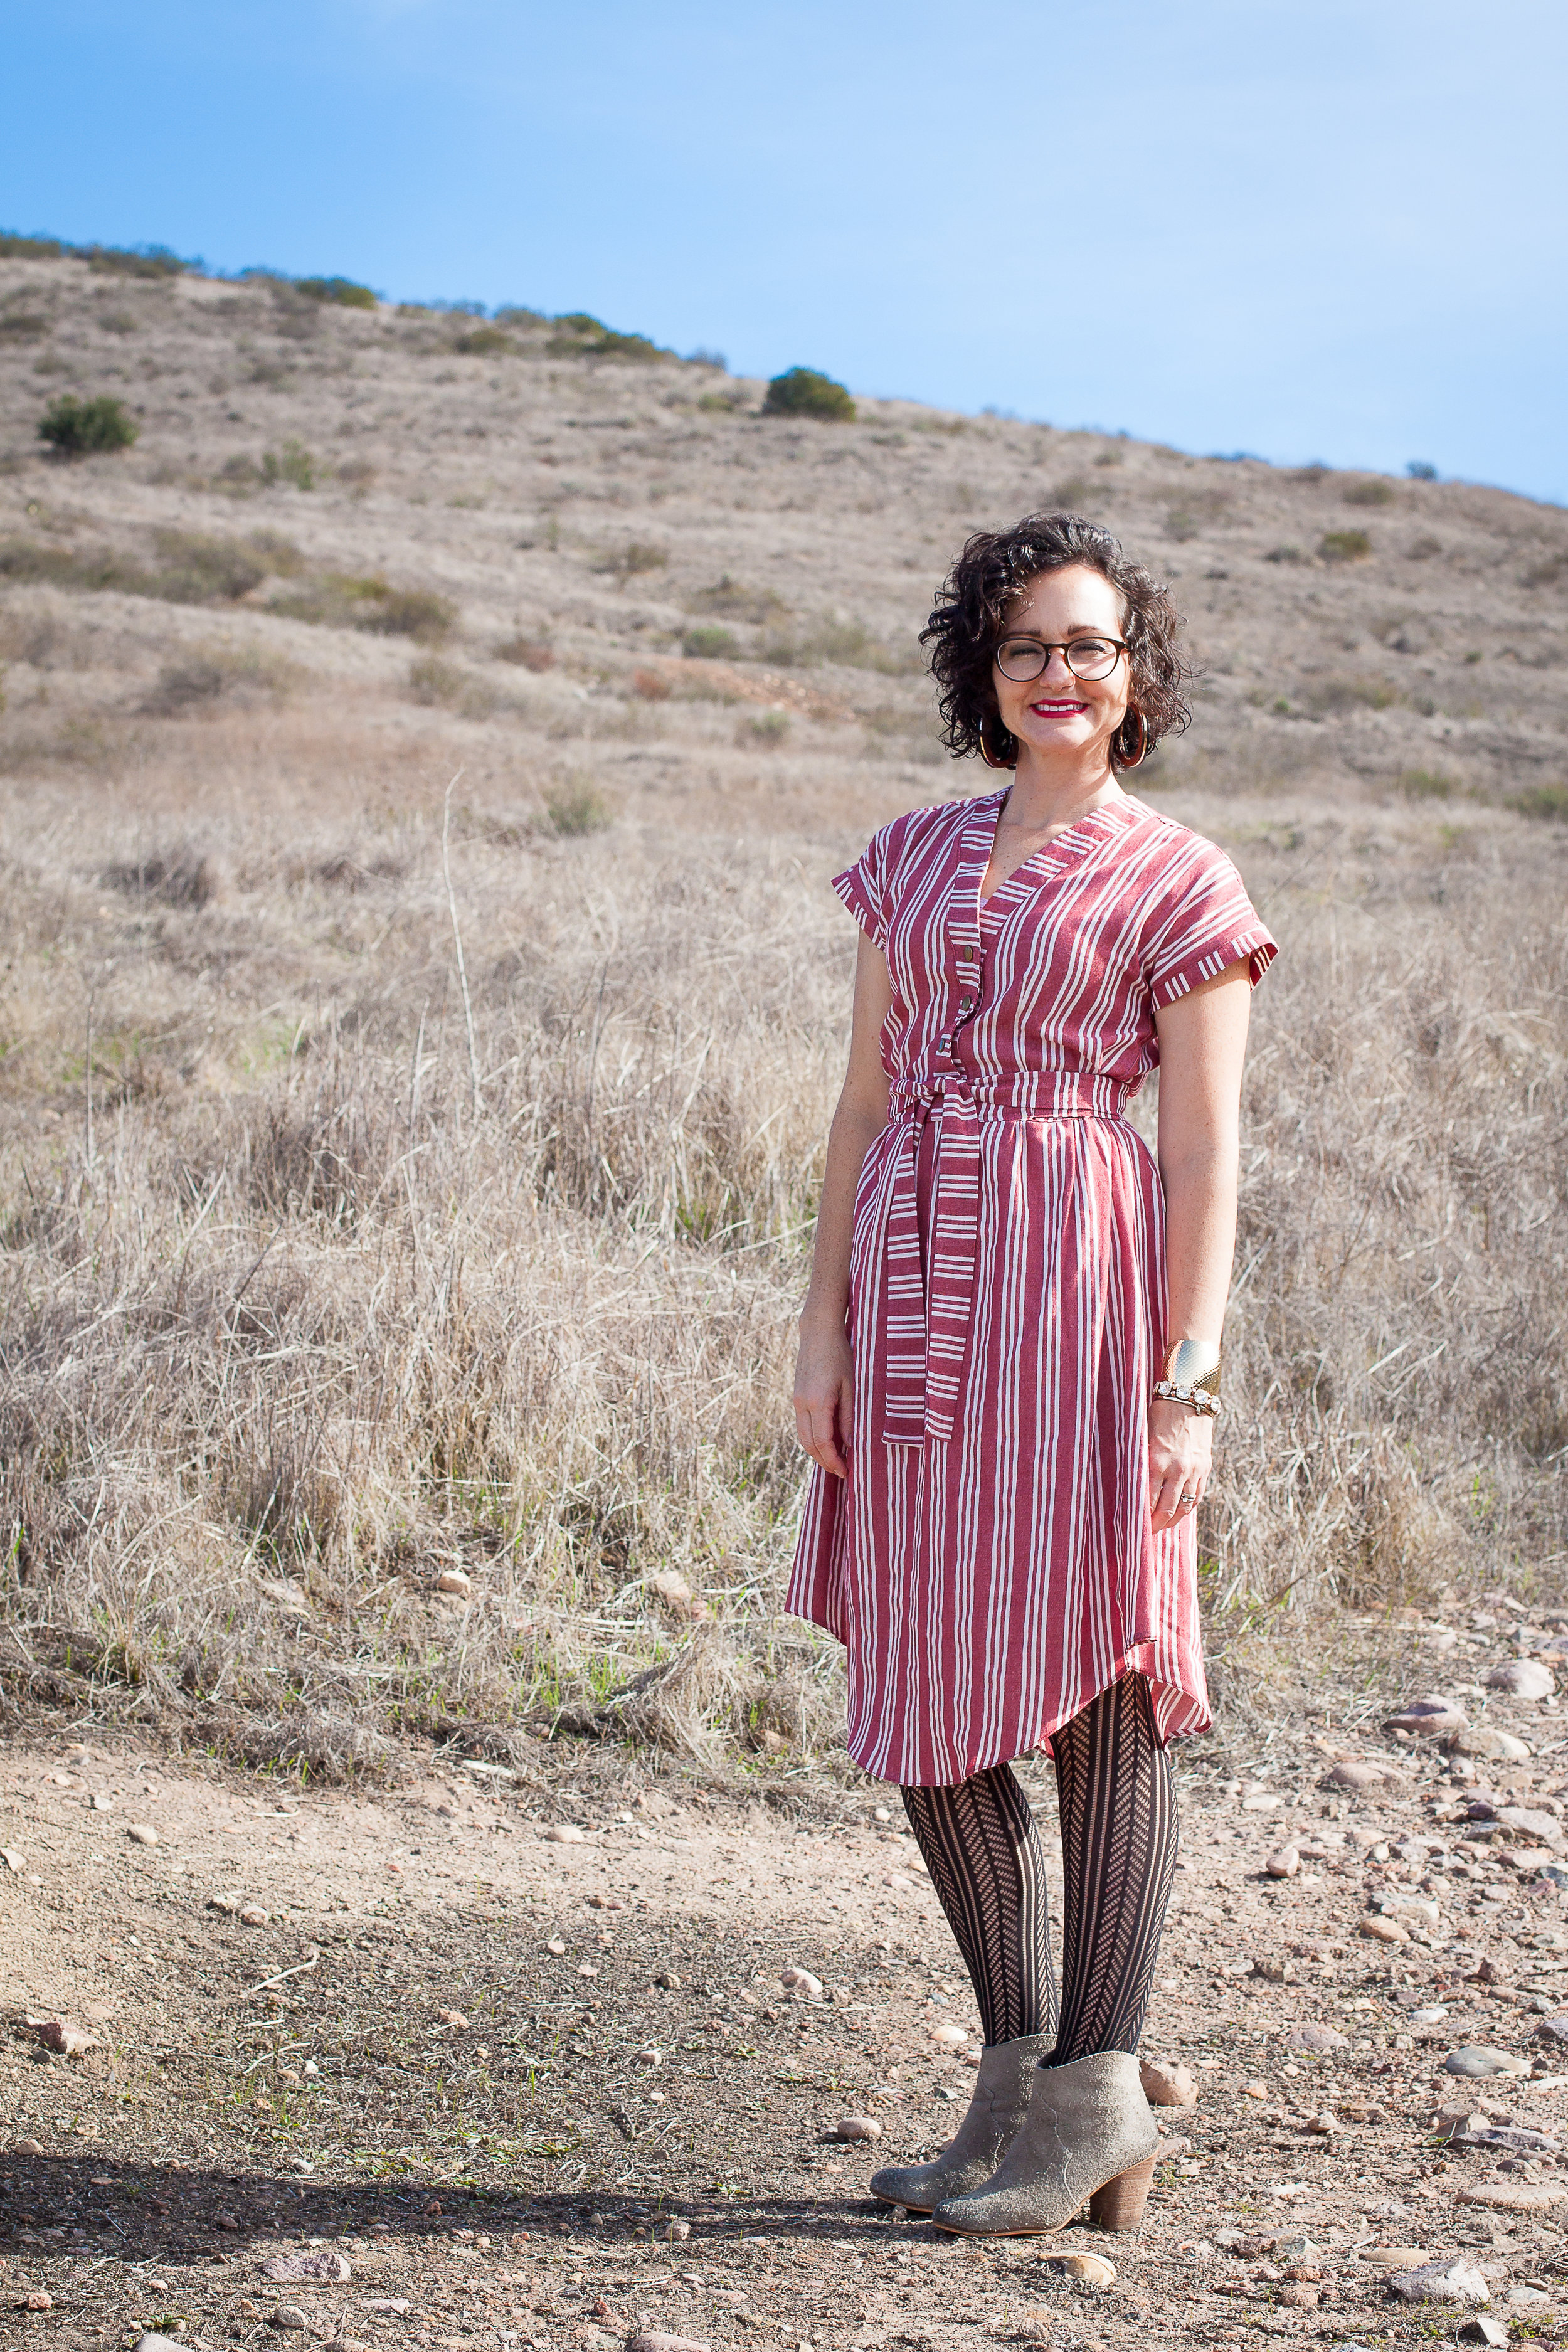
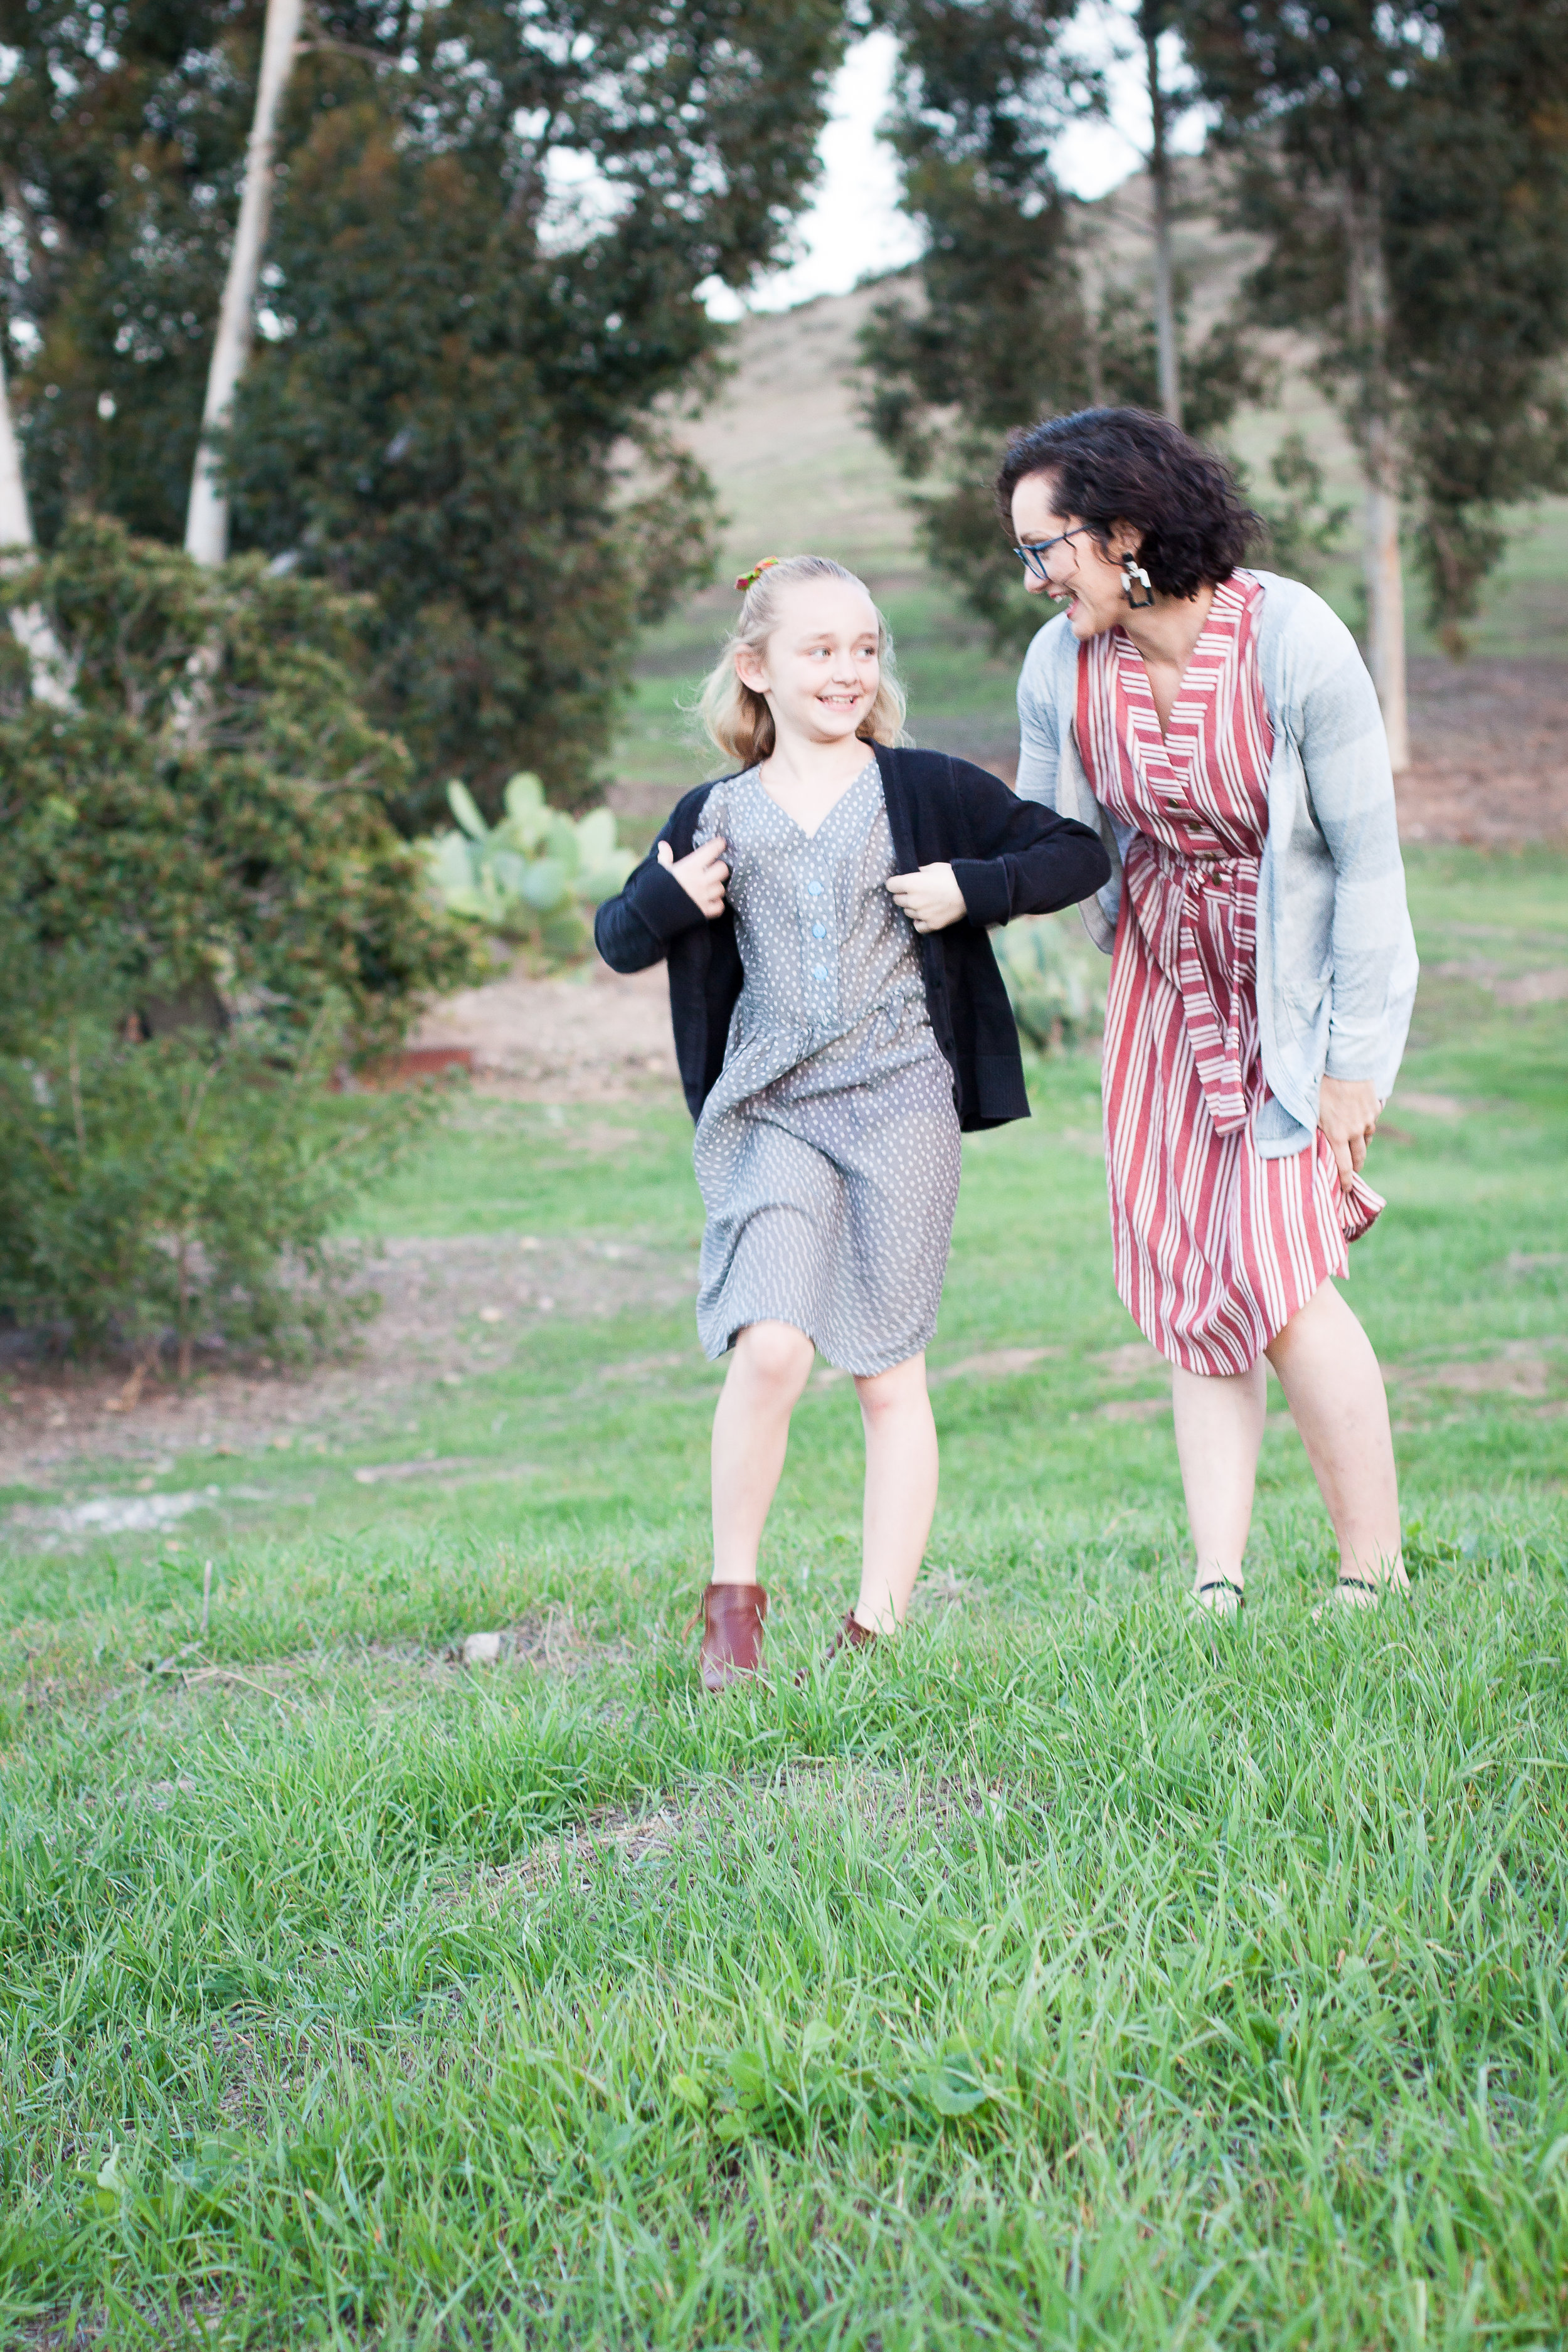
And he knows me. Color is my jam! Pattern mixing is like baking without following a recipe! Its fun, intuitive, and sometimes doesn’t work out! Ha! But I love it! And as much as I love color, I also love the basics. This dress is such a piece.

LDM8.jpg

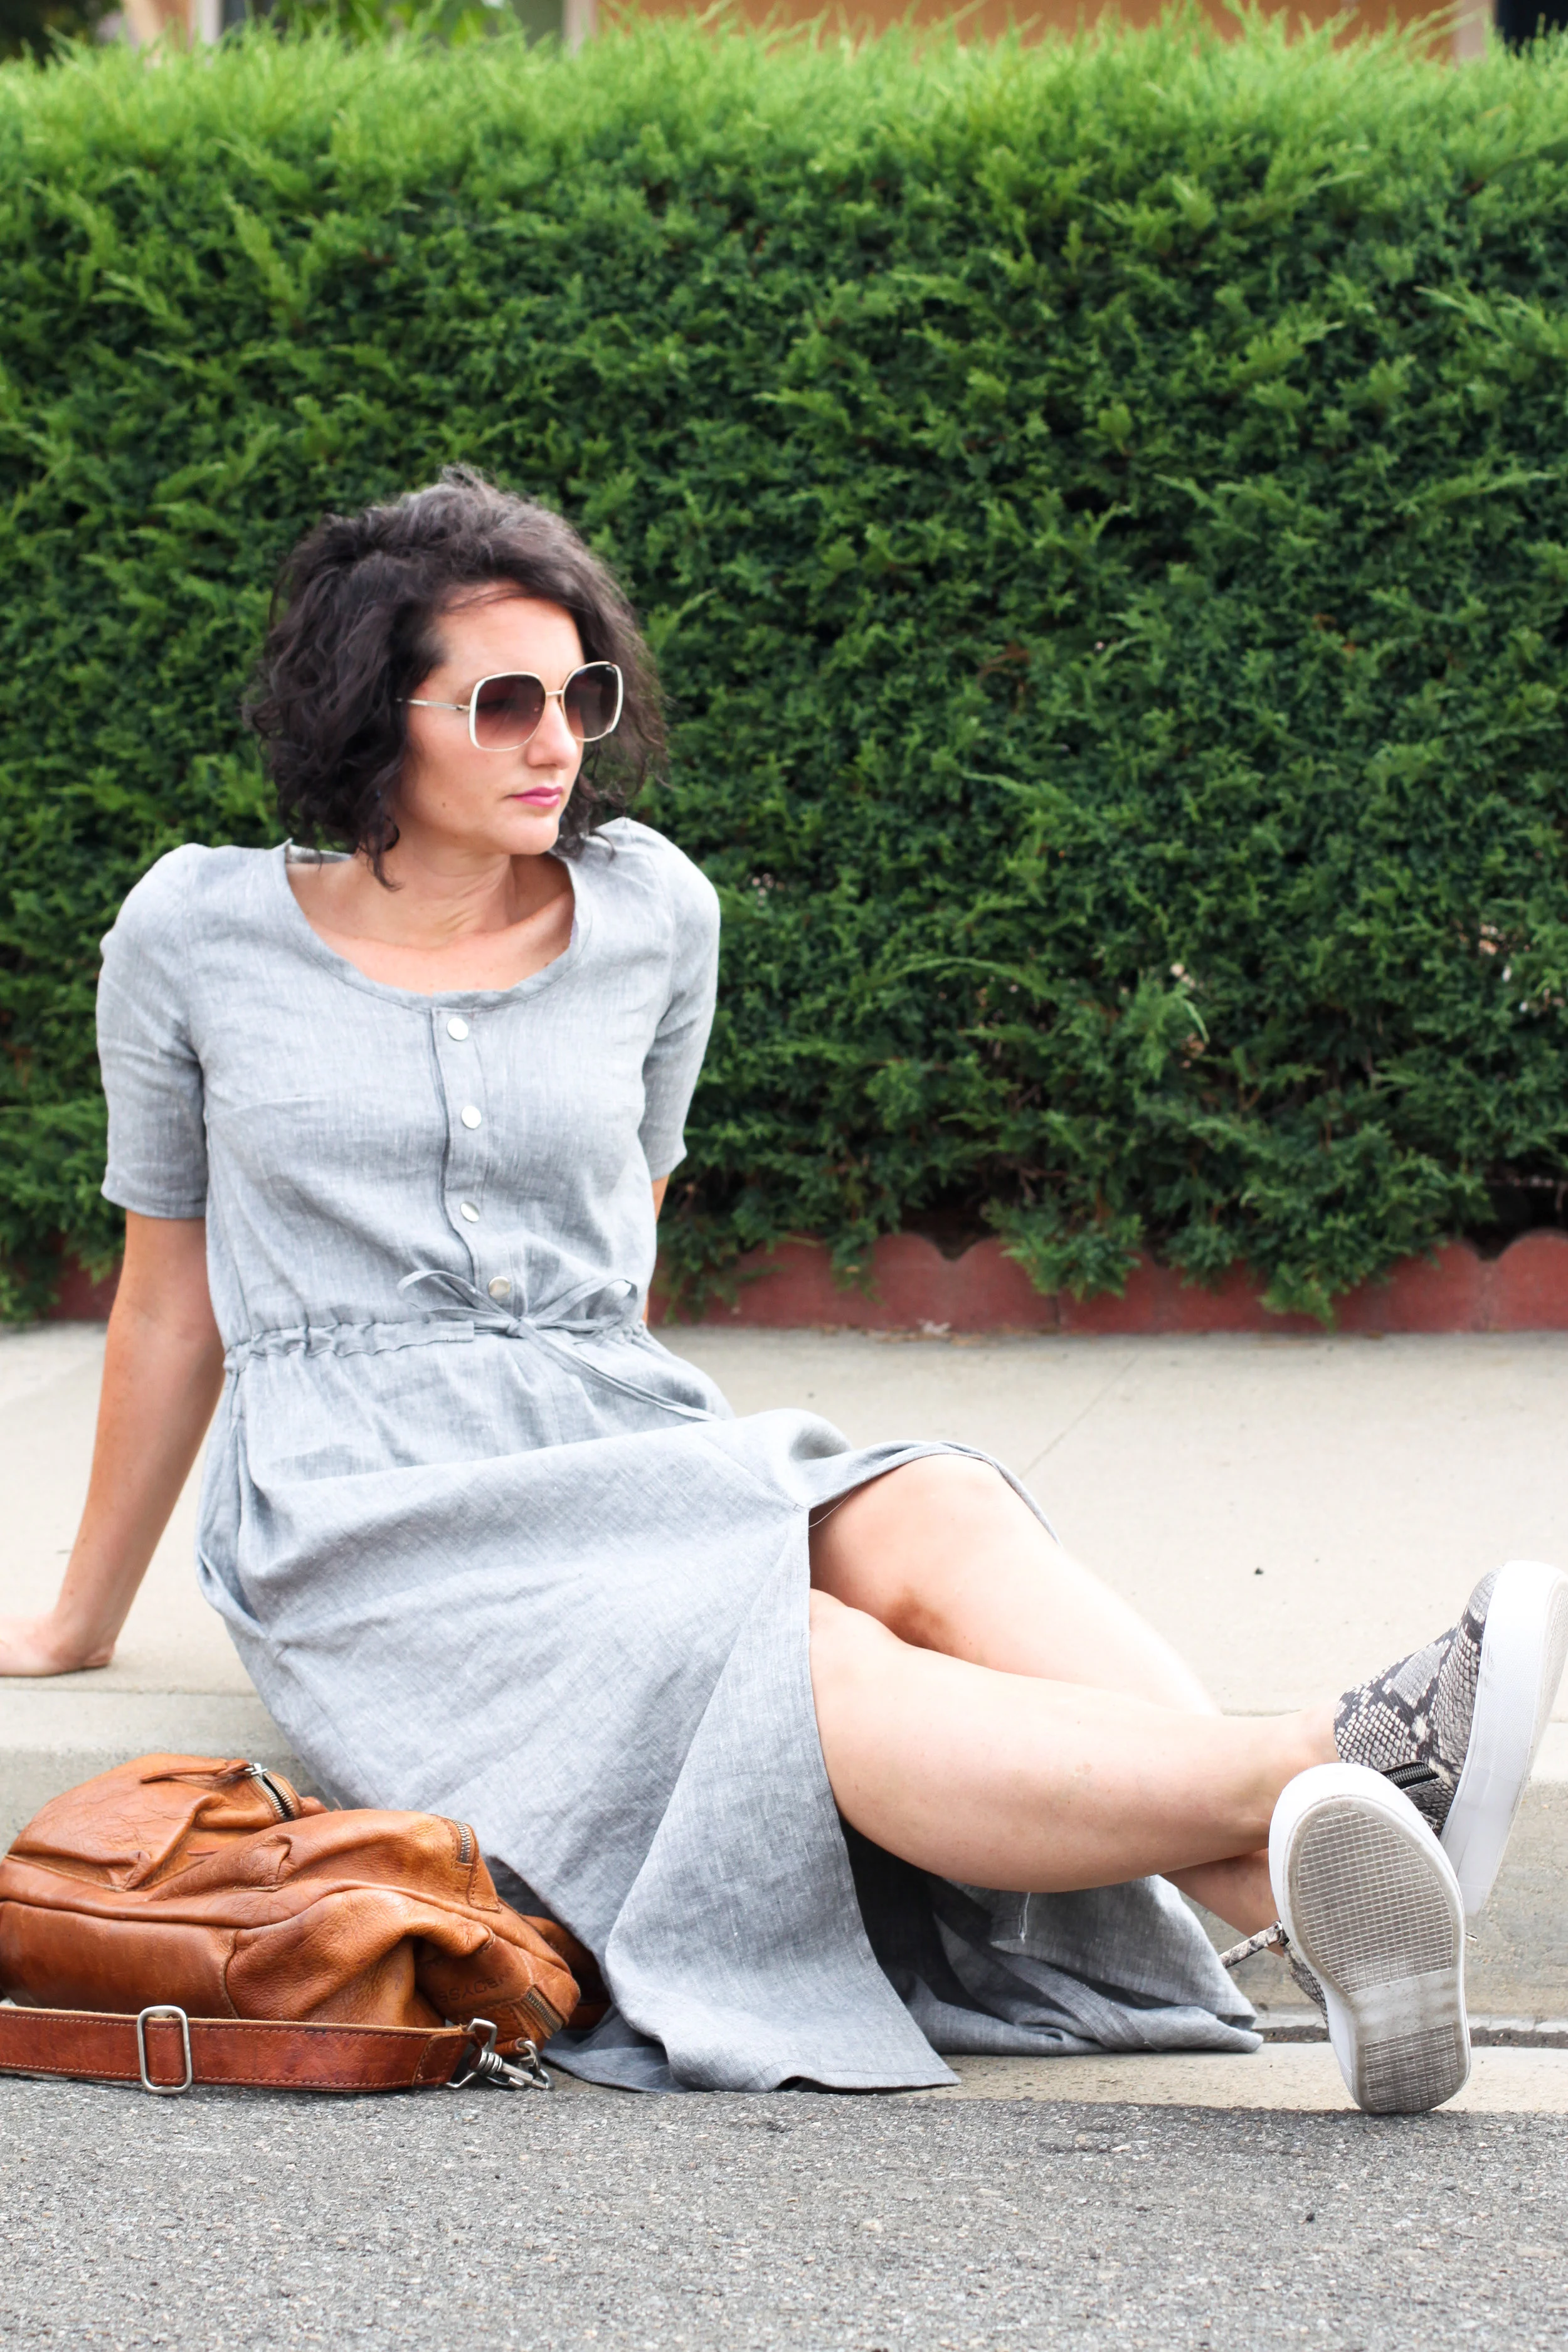
I wanted to make the Southport Dress by True Bias, but I wanted to add sleeves. I did not follow the complete construction of the Southport Dress, although I think I would have made it easier on myself if I had.

I wrote a lot about my dress already over on the Minerva blog, but I wanted to add a bit more about the details and construction of my dress here.

LDM1.jpg

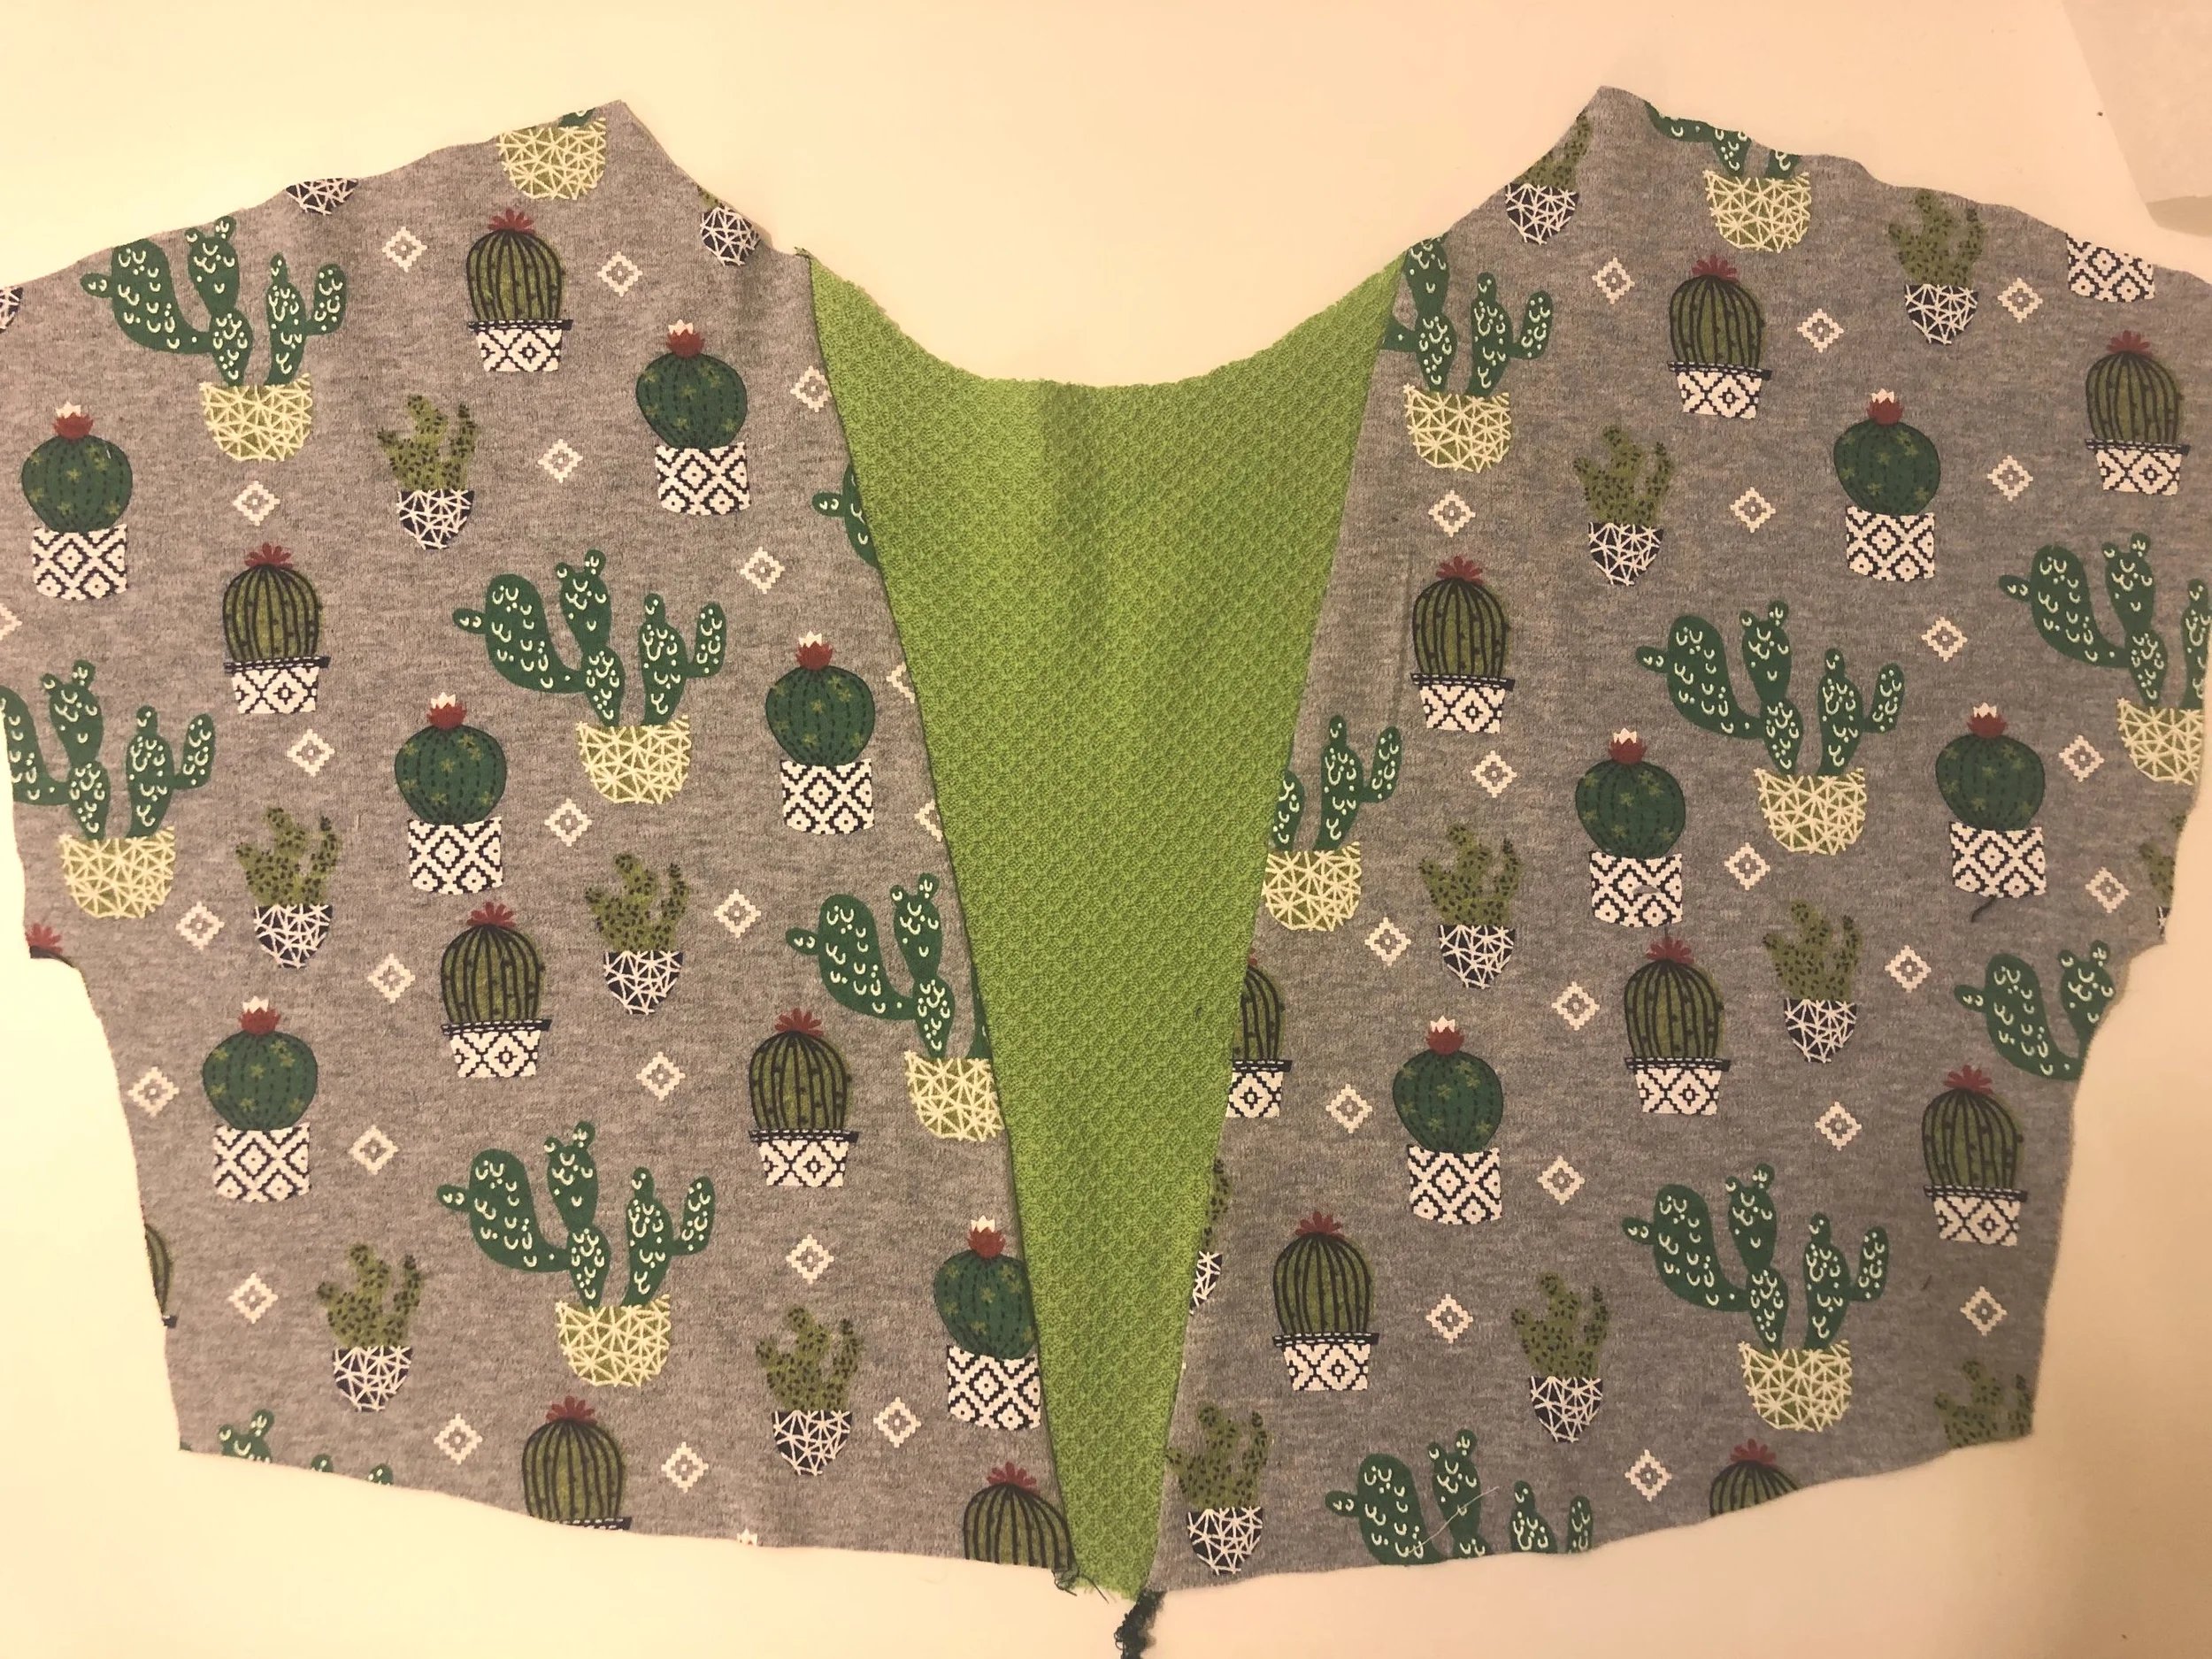
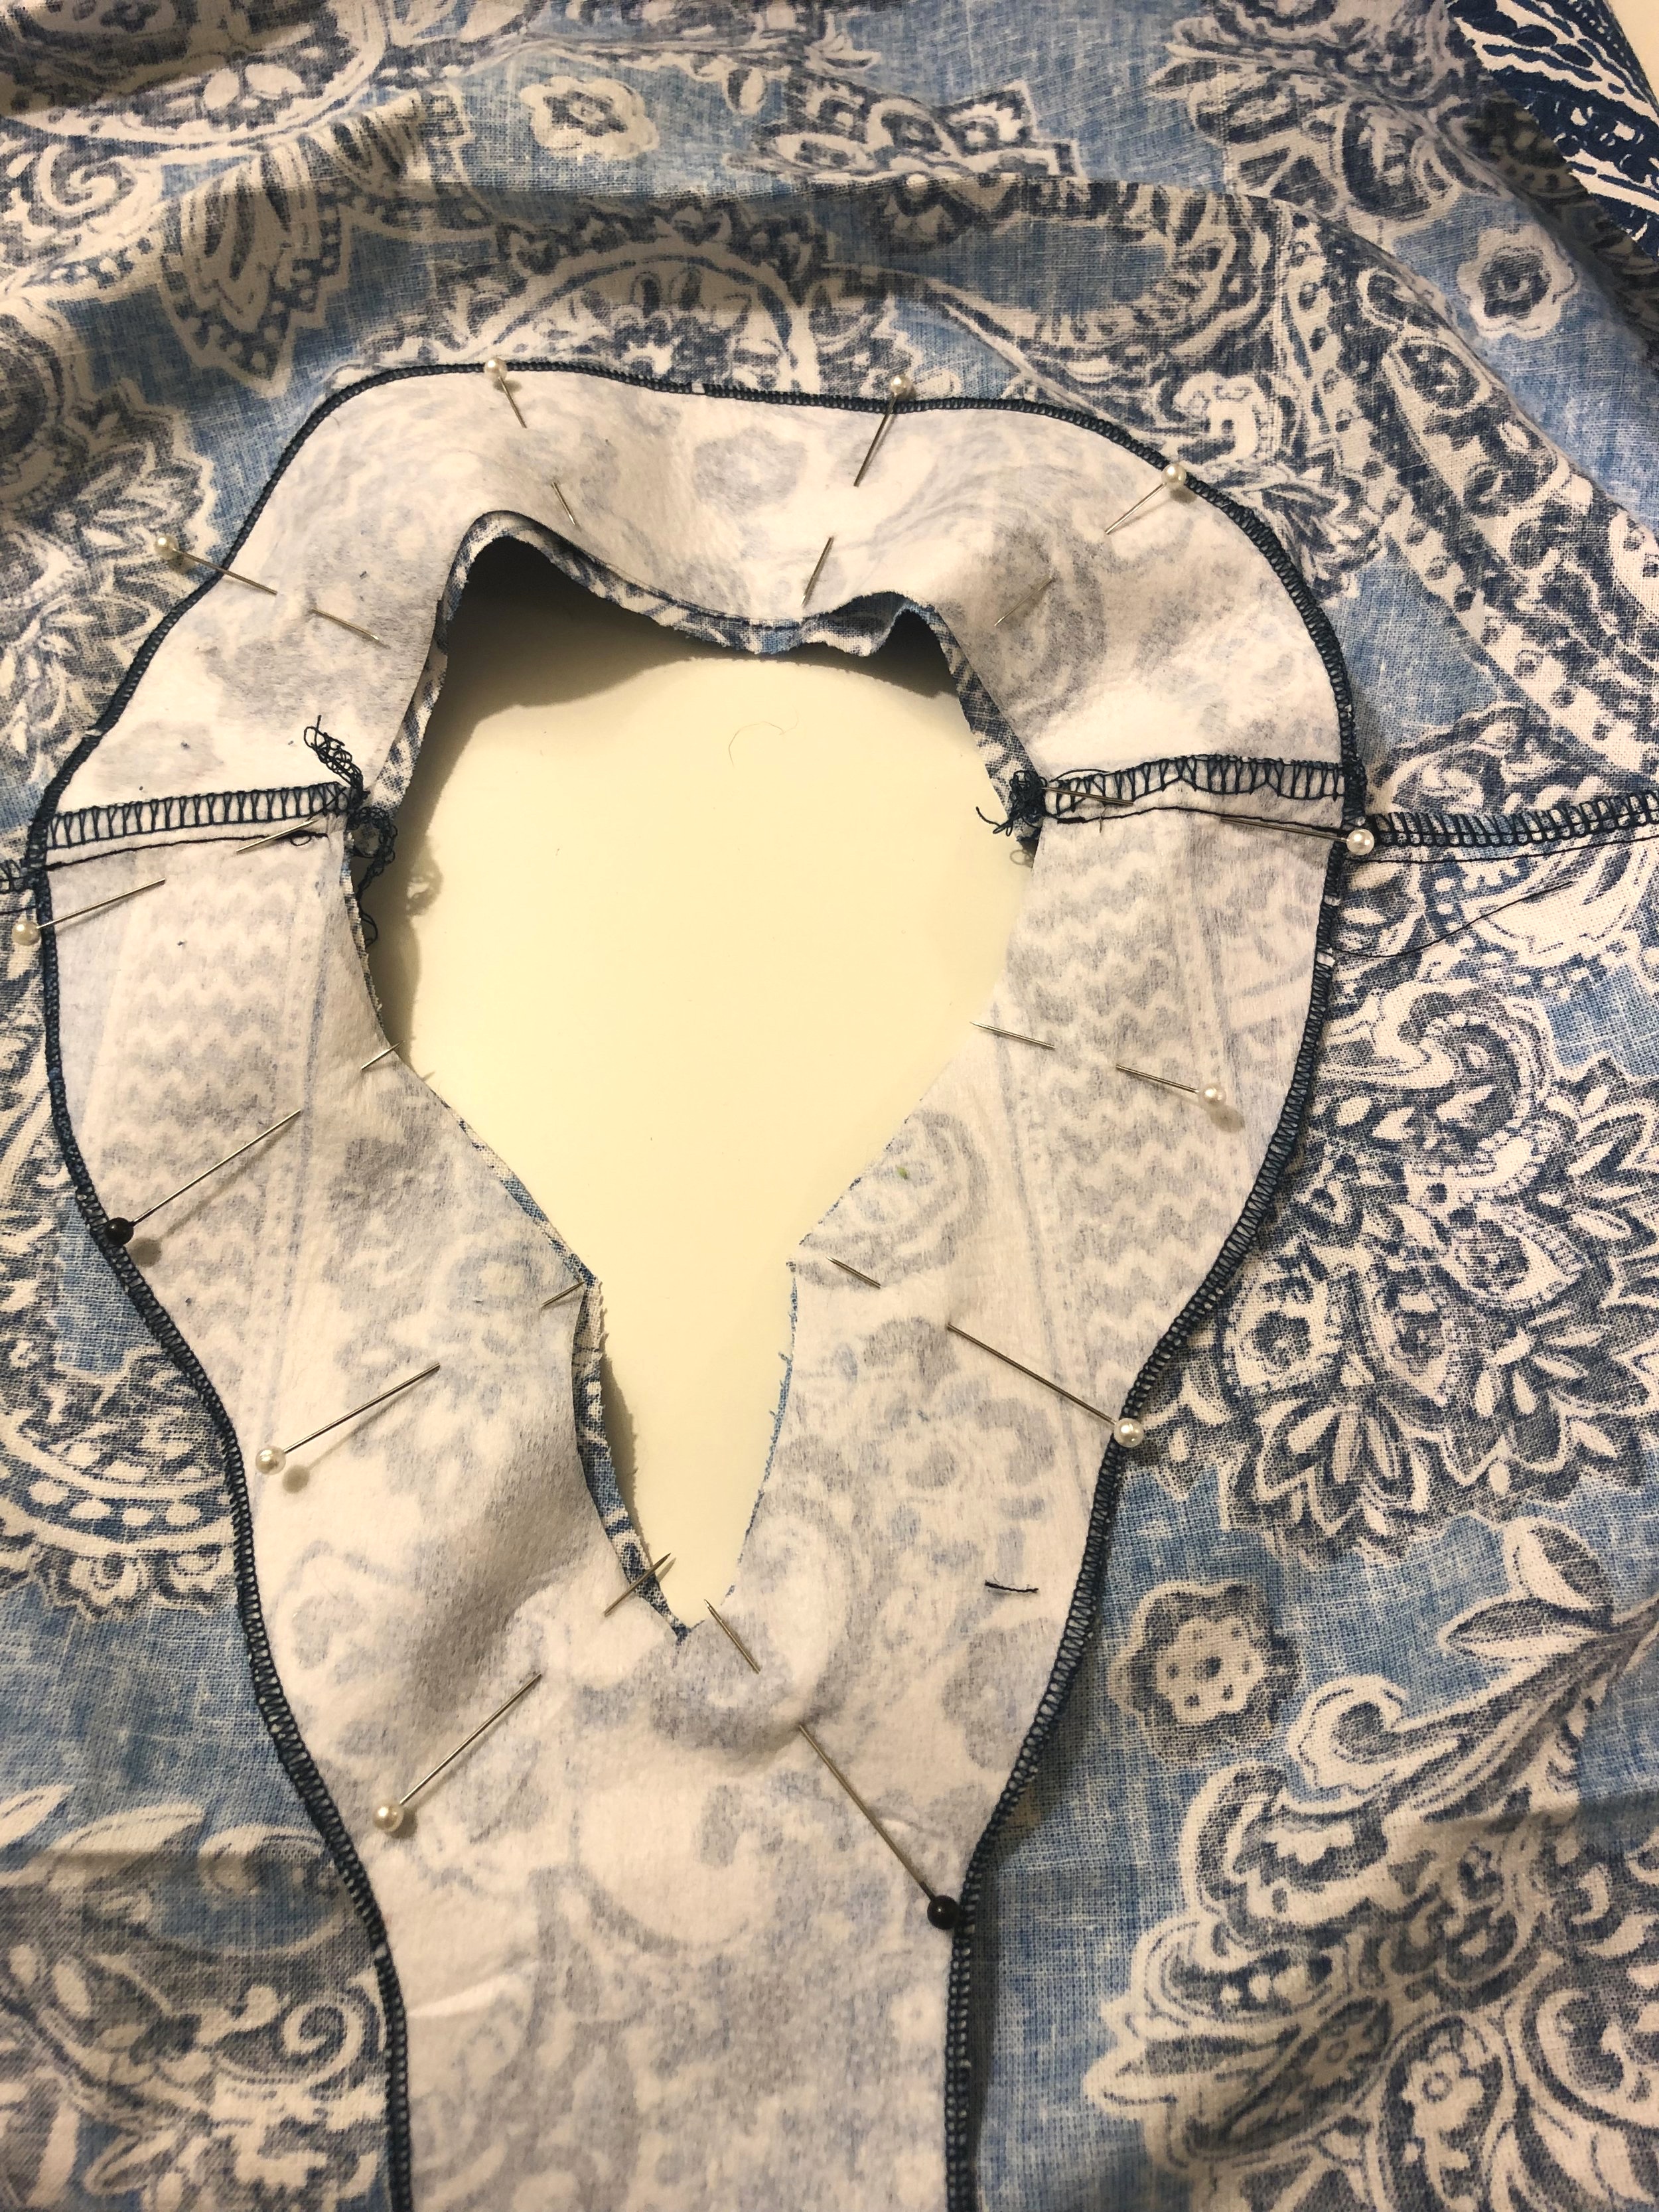
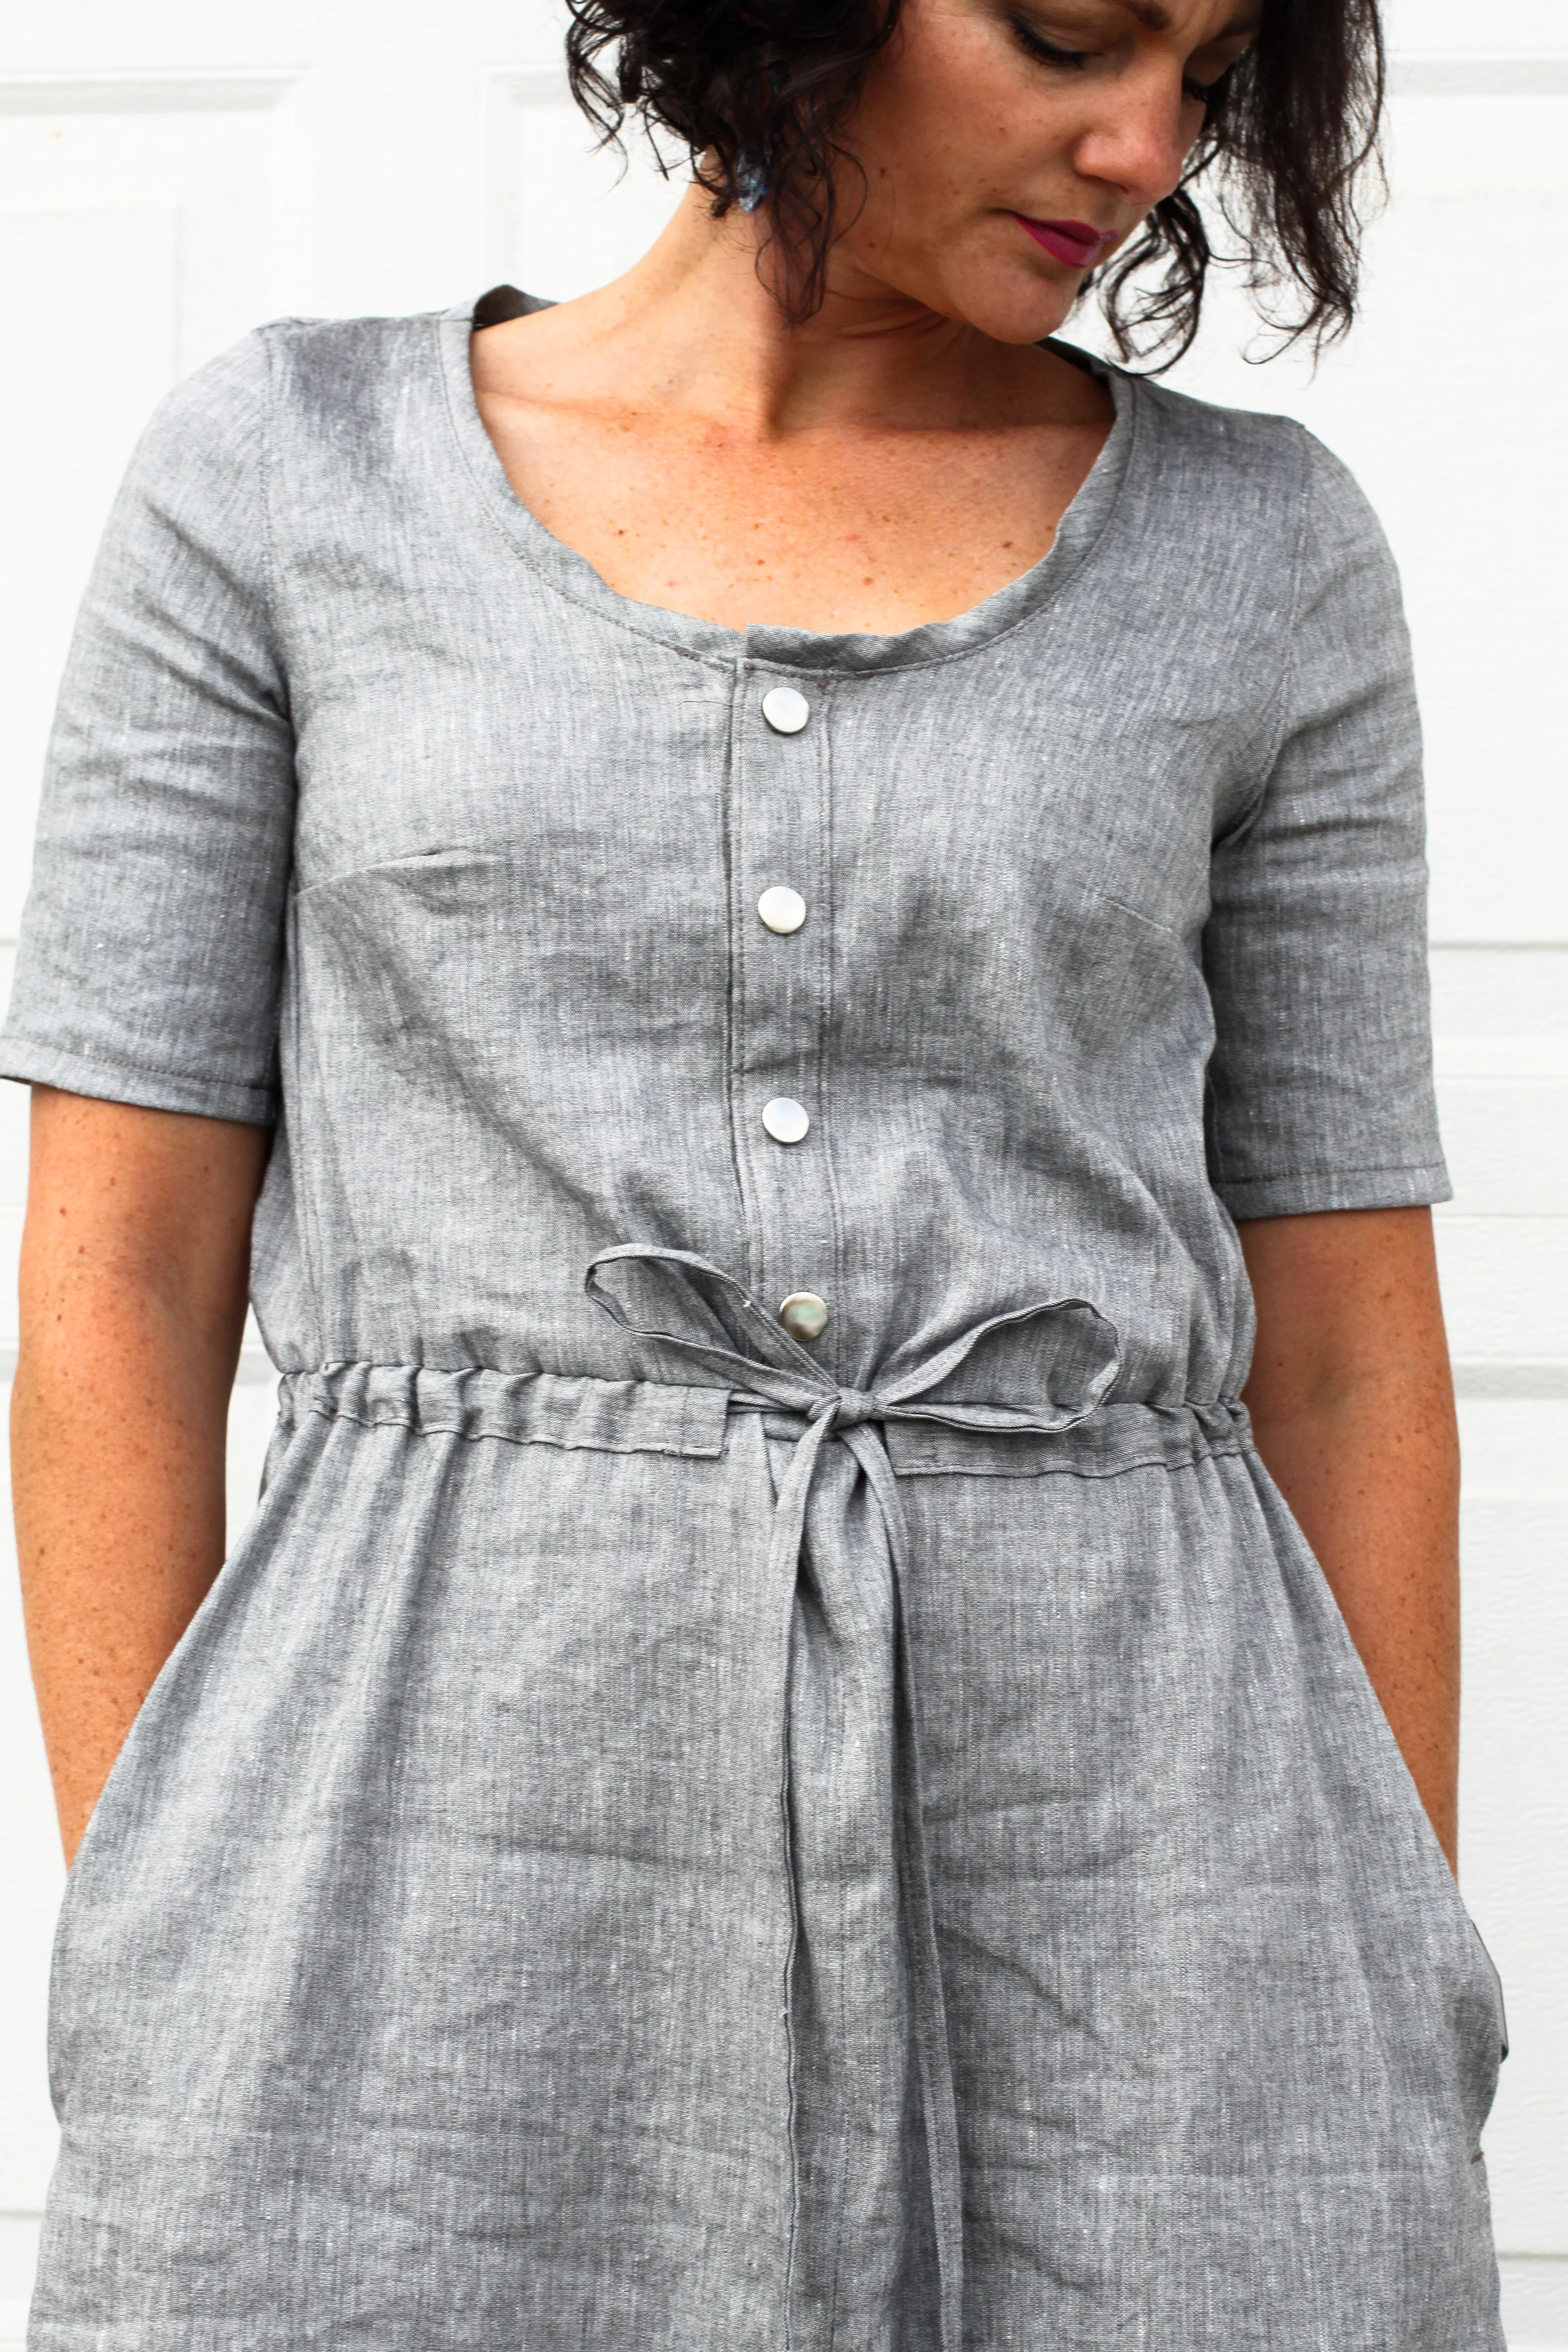
I used the Panama Tee Dress by Alina Sewing and Design Co for the armscye and sleeve pattern. I simply laid the Panama Tee pattern on top of the bodice of the Southport Dress, tracing the shoulder area and armscye of the Panama Tee with the width and overall shape of the Southport. Then I traced longer sleeves using the Panama Tee sleeves. Instead of sewing on the neck binding as bias binding I sewed it on more like a neckband. I am also smaller chested than the pattern is drafted for, so I moved the darts and took some height out of the shoulders, before adding the sleeves. I also took some width off the bodice, which I then had to match with the width of the skirt. I raised the neckline, which I am very glad I did as it still was very low on me, I think due to my small chest. I additionally raised the slit on the skirt.

LDM11.jpg
LDM22.jpg
LDM10.jpg

All these modifications (plus those mentioned on the Minerva blog) meant this project was not a quick one. I admittedly used my seam ripper a lot. I cut out more than one sleeve as the first pair I forgot to add width (Panama Tee isn’t drafted for a woven). The modifications to make this dress were not few, but 1000% worth it in the end. I am so happy with it and will make it again.

LDM5.jpg

It is the perfect around the town, pick up kids from school, meet my girlfriends, sew in my sewing room, run my errands, evening meetings, and date night attire. The linen from Minerva makes it so soft, classic, and easy to wear. I look forward to wearing this piece year round!

LDM2.jpg
LDM18.jpg
LDM17.jpg
LDM15.jpg

My Sewist Journey

I first asked for a sewing machine as a gift/consultation prize for graduating with my BA from college. At the time, I live with my husband in the basement of a house. We were both students and working. Money was tight, but together we bought my machine. This was back in 2007. I tried for months and months to sew these small, blue and red curtains with a sun design on them (a glorious vision in my brain) to go in our shower, that also happened to have a window in it that opened to the inside of a garage. I eventually gave up and boxed the machine for the rest of the year. Yes, consequently some flashing did occur.

2008 our first child was born. I took the machine back out and self drafted a series of ill fitting dresses, with a haphazard quilt thrown in. Zippers, buttons and knits scared me so I just made huge neck holes and hoped for the best.

I attempted several more garments over the next few years, each without a pattern and each taking me months and months to complete, if in fact I ever made it to the end. It wasn't until my daughter was almost four that my neighbor, whom I loved, introduced me to indie patterns. This was pandoras box for me. I have been sewing since.

It is only recently though (the last few years) that I have returned to self drafting the things that I wear, which is what intrigued me about sewing in the first place. I have continued over the years to build my skill base in sewing, allowing me now to confidently veer from a pattern and make the visions in my head.

Why do I wish I had moved toward patterns (indie patterns specifically) sooner, even though I love the creativity of self drafting? I remember having my mind blown with the first three patterns I followed. I learned SO much! There was so much less trial and error, and Indie patterns I felt were way easier to read and understand for a beginner, compared to big box store patterns.

So, my advice to new sewists: Follow patterns, specifically indie patterns, until you learn construction, techniques and methods (move to big box patterns once you are confident with Indie Patterns). Each item you sew will be a jam packed learning experience. Then when you feel ready, start making things on your own. Above all, make those mistakes. Use that seam ripper. It means you're learning and you're trying and you’re improving.

Top: Self Drafted with high/low hem, leather pocket, and drop shoulders

Pants: Phillippa Pants by Anna Allen, fabric 10oz canvas from Big Duck Canvas

IMG_9236.jpg
IMG_9228.jpg
IMG_9355.jpg
IMG_9269.jpg
IMG_9329.jpg
IMG_9276.jpg
IMG_9296.jpg
IMG_9358.jpg
IMG_9250-2.jpg

My Design Line: January Edition

Things that went well:

  1. Use of the free My Design Line Monthly Overview Sheets found here (get your own by subscribing to ICI’s newsletter and having them sent directly to your inbox!). I printed them out, hashed out all the details, and then wrote on the bottom any additional notes on fit changes, etc. I’ve had them hanging on my sewing room wall all month to more easily refer to and jot down notes.

  2. Planning, design, and finished product of pants - I was careful. I unpicked seams, measured twice (understatement), and didn’t rush. I am so pleased with the final product.

  3. Small scale building of community and support - I enjoyed seeing what others were working on during the month, and most especially getting the support of my husband as we planned and made his first garment for 2019.

Things to improve:

IMG_7873.jpeg
  1. Time management of completing projects - be more patient and flexible with my timeline (and start my projects I know will take longer and I want to be more careful with earlier in the month).

  2. Have the right tools - My sewing is my art. It is disheartening to spend so much time on something only to have it not finished the way you want it to because you do not have the right tools (looking at you waistband).

  3. Overall value of my work - I need to charge more for my skills. Ha! I realized how much I have learned and consequently how much more confidence I should display in my abilities. Sewing is a true and valuable skill. I am learning more daily.


JanMDL11-1.jpg

As a refresher, for My Design Line 2019 I am making both a fashion line/collection for my husband and one for myself. My goal is to have our two lines intersect, with mine being a slightly more artsy (read fun!) version of his. It is a challenge that feels so exciting and empowering to me.

Here are our January Design Pillars/pants explained:

His Pants:

  1. Earth: Dark gray color, rugged material able to withstand the outdoors.

  2. Heritage: WWII inspired pants with side pocket and durability.

  3. Movement: Gusseted crotch - I have never added one of these before. Luckily, and after trial and error and fear on my part, we discovered that Thread Theory has a blog post written about how to add a gusseted crotch to the Jutland Pants!

  4. Forever: 12 oz vintage stone washed canvas - it is thick, durable, and substantial.

JanMDL21-1.jpg

Details:

IMG_7988.jpeg
  • I did a 4/8” seam allowance on the side seams where the rest asked for a 5/8” to allow for a little more room.

  • My husband is 5’8” tall. I adjusted at the lengthen/shorten line on the legs, and then raised the knee patch accordingly.

  • I made a gusseted crotch. I sweat a bit over cutting into the pattern I had worked so hard on and messing it up, so I did as much research as possible. In the end it turned out perfect.

  • Jutland Pants have two cargo pockets on either side of the pant pattern. My husband asked that there only be one pocket on his front thigh that he could easily place his cellphone in.

  • My husband asked for mountains on his back pockets. I was so happy/suprised (he usually likes things very plain) because of the mountain pockets I saw on the inspiration version of the Jutland Pants.

  • What I should have done? I should have drafted a curved waistband. My husband will need a swayback adjustment in most shirts, and I knew this, but still didn’t make a curved waistband. I will do that from now on.

  • The one other adjustment I will make next time is to move the cargo pocket more on the front of the thigh, per his request.

Her Pants:

  1. Earth: Dark gray color, rugged material able to withstand the outdoors, leaf appliqué tutorial taken from V and Co’s blog.

  2. Heritage: WWII inspired with side pocket and durability

  3. Art: Flow/placement of appliqué; applique itself

  4. Unexpected: Leaves down my side and back of my pants - also, appliqué on pants!

JanMDL9-1.jpg

Details:

IMG_7990.jpeg
  • My waist is a size 8 and my hips are between as size 4-6 in the Bryce Cargo Pants. I knew I would need to size up as I asked Adrianna about the ease in these pants and she told me there is none in the hips. The pants are intended for stretch material, which this duck canvas is not.

  • I essentially straightened out the hips, which is a normal adjustment for me as I have none. Ha!

  • I added 1/2” to either side of the bottom of both the front and back leg pattern piece and graded up to just above the knee. After looking at the pattern closely, I knew with little stretch I would need more room in the legs below the knees.

  • In keeping with matching my husbands design I added just one cargo pocket on the thigh of the pants. And guess what… ladies… we are getting ripped-off! Having a pocket on your thigh to put your cell phone in makes bending, sitting, twisting, etc. so much easier! That and the size of the front pockets on these pants! They are a total dream!

  • I also took in the seam allowance by about 1/4” on the inner thigh of both pants.

  • I added appliqué leaves to the outside of one leg and the opposite back pocket before sewing up the pants. I also left the flaps off the back pockets.

    **Special note: Hey June’s instructions for the Bryce Cargo pants are amazing!! I wish I had made them first and my husband’s second as I felt like these instructions helped to clarify a lot of the construction.


Both Pants:

My machine is old. I got it when I graduated from college back in the mid 2000s and it is a basic, entry level Elna. While it has served me well, it doesn’t even have a lighting stitch. It could not handle the many thick layers of the waistband. As such, I took it to a local tailor with an industrial machine. It was hard because taking it to the tailor gave away my control over my timeline, and how the waistband would come together. I also was surprised at the $65 price tag for sewing two waistbands (they were already attached on the outside, pressed, folded over and pinned so that they were ready for the final sew). I asked for the belt loops, also already attached, to be sewn to the upper waistband. Long story short, I won’t use a tailor again. The idea behind Independent Clothing Initiative is to recognize the ability and joy that comes from being our own master - from being exactly who we are, while reaching for the stars. I will try harder to ask friends to use their machines, or get the tools myself that I need next time.

All in all, I loved making pants so much for my husband and myself this month, and I look forward to what next month will bring as I make our second My Design Line garments - flannel shirts!

January 2019 in Review

January was -

  • 3 pairs of pants

  • 2 sweaters

  • 4 dresses

  • 5 garments for family members

  • 4 garments for myself

  • and a little bit of painting


This year, not only do I have goals to increase productivity, but also to sew more for others than for myself. So far, in January, I am reaching those goals!

I am in disbelief that January is over! I hope January treated you right! It was a good month month for Independent Clothing Initiative.

We not only launched our new website, but also a new #mydesignline initiative for 2019. We have had so much fun in the process! I made a pair of thick, vintage stone-washed 12 ounce duck canvas pants (patterns are the Jutland Pants from Thread Theory and the Bryce Cargo Pants from Hey June Handmade) for both my husband and myself for our January pieces. I learned so much in the process. Look forward to a blog post coming with all the juicy details.

We hosted a give away with Chalk and Notch to celebrate and made four new versions of the Girls Fringe Dress. I had so much fun thinking of ways to make each dress look a little different, not just in fabric but style as well. I modified by making a maxi version, a knit two piece version, and two versions featuring contrasting yokes with ties. You can read more about them here.

I sewed some #sewfancypants, and did a fancy pants dance! Go to my instagram to check that out! I hand embroidered some striped half moons ( fabric from National City Swap Meet - a local Saturday/Sunday shopping market in San Diego) and painted with acrylics mixed with a fabric medium found at Michaels. I also used a fabric sharpie to outline my designs. The pants pattern is the famous Persephone Pants from Anna Allen Clothing and the fabric is from JoAnn’s Fabrics.


I also made two versions of the Toaster Sweater by Sew House Seven. Both versions were made using JoAnn’s Fabric and were such a breeze to sew with! Now I want to put a lace front panel on everything!

IMG_6776.jpeg

I even painted a little. It was so fun to take back out my brushes and pens and let my mind loose on paper.

I encouraged my kids to do more of this same thing this month as well.

What will February look like? I can’t wait to find out!

Girls’ Fringe Dress

It was so fun to host Indedenpent Clothing Initiatives’s first giveaway sponsored by Chalk and Notch. We gave away the Girls’ Fringe Dress pattern, the companion to the original Fringe Dress Pattern.

I had previously made both a dress for myself and my daughter, so I was extra excited to give away a pattern I already love so much!


gfdgiveaway8-1.jpg

Linen Girls’ Fringe Dress

The first dress I made during giveaway week was this linen/linen blend version (both fabrics from JoAnn’s). Linen might be my favorite type of fabric, and this watercolor linen I have saved in my stash for an embarassing number of years as I have waited for just the right project to use it for. And I am so glad I waited! This dress turned out perfect!

As I did with my candy cane inspired Fringe Dress, I used the facing pattern piece, added a seam allowance, and cut out the neck yoke. I then cut out from the dress the facing pattern piece minus the seam allowance along the neckline from both bodice front pieces and the back piece neckline. This allowed me to make a contrasting neckline that was the same size/shape of the patterns original neckline.

gfdgiveaway7-1.jpg

I made the ties extra thick and long in length so they could wrap around her back and be tied in the front.

I also added snaps instead of buttons and button holes. I really like the clean look of snaps, not to mention they are easy to insert. I used one less snap than the pattern called for in buttons with no gaping issues.

The hemline of the skirt is not the iconic hemline of the Fringe Dress but straight across the bottom.

This might be my daughter’s favorite of all the versions, although she struggled to pick just one!


The second of the Girl’s Fringe Dresses during giveaway week was a knit, 2 piece version.

gfdgiveaway11-1.jpg

Knit, 2 Piece Girls’ Fringe

I knew I wanted to try this dress in knit. I was excited when I thought about making a two piece and consequently getting more wear from both pieces. The top includes a color blocked refashion of an old banana republic sweater of mine that I have had 10+ years.

I used view B and eliminated the notched neckline and instead cut it out to be a crew neck. I cut out a neckband accordingly . I also lengthened the sleeves.

The bottom is an elastic waistband, gathered skirt with pockets.

This fabric is also the perfect companion to the dress. Dreaming, whimsical, and an ode to our loved San Diego desert.

If you click on each pictures above you can read a simple step by step instruction of how I cut out the bodice.


The third version of the Girls’ Fringe Dress, I knew I wanted to turn it into a maxi. I love the option of a long skirt on chillier mornings, and my daughter currently doesn’t own any.

gfdgiveaway16-1.jpg

Maxi Length Girls’ Fringe

Besides the length of this Fringe, the biggest style feature is the neckline. I thought long and hard about how I could put a collar on the notched view (View B) of the Girls’ Fringe Dress. In the end, I realized if I sew the neck facing on the outside of the dress instead of the inside I could create a similar effect to a collar.


I love how this neckline turned out. I set up my serger to do a rolled hem and ran it along the outside of the facing. I laid the facing right side to wrong side of the bodice and stitched along the neckline (see photo below). I then flipped the facing to the right side so it was right side up on the right side of the front and back panels and ran an edge stitch along the facing to attaching it to the bodice.

I also lengthened the bodice as seen below.

This might have been our most fun/cold photo shoot, which I was grateful for as my model was pretty tired of me dragging her outside at this point!


The final Girls’ Fringe during giveaway week was constructed just like the first using contrasting yet coordinating fabrics.

IMG_6894.jpeg

Contrasting Girl’s Fringe

And, for the first time I remembered to insert my labels from Dutch Label Shop! I am not used to having them yet and forgot to put them in 80% of my makes this month.

This dress is made from the Balboa Line of Cotton and Flax’s Essex Linen in conjunction with Robert Kaufman. I love the hand painted quality of the fabric.

I again added three snaps and a long, thick waistband that could be brought around and tied in the front.

The skirt is a basic, gathered skirt.


I am prepared to call our first giveaway week a huge success! I am so thankful to Chalk and Notch for sponsoring and creating such beautiful patterns! Can’t wait to make more!